
I finally had access to an “NVIDIA RTX 3090 (24GB VRAM)” for my old PC (Intel Core i7-6700K, 32GB RAM) and I started experimenting with training my own Stable Diffusion models and creating LoRAs. I was overwhelmed by what you can do with it!
I created a few LoRAs from hand-picked datasets, resizing and cropping the images myself to 1024px and including caption text. The LoRAs worked pretty well, and the creation time on my system was about 15 minutes, but you have to experiment with different settings until you get it right, and that’s a bit tedious at first. The LoRA files are about 140 MB in size.
However, I have found that a trained Dreambooth model gives even better quality, only requires 512 pixel images and is very easy to create with the right application. The disadvantage: the trained Dreambooth model is about 4 GB in size! This is where the LyCORIS extraction comes in, taking only 20 seconds. It delivers excellent quality and is only 90 MB in size. Ideal for faces. (But you need a GPU with at least 24 GB VRAM and a PC with 32 GB RAM, otherwise you won’t be able to do the training).
- You need to install these applications:
NMKD 1.9.1 GUI (easy creation of Dreambooth models via integrated presets).
https://nmkd.itch.io/t2i-gui
bmailtais/koyha_ss (to extract the LyCORIS)
https://github.com/bmaltais/kohya_ss
If you need help installing “bmailtais/kohya_ss”, check out this YouTube tutorial. Olivio did a fantastic job explaining it and also shows how to create a standard LoRA if you want to try it out: https://youtu.be/9MT1n97ITaE
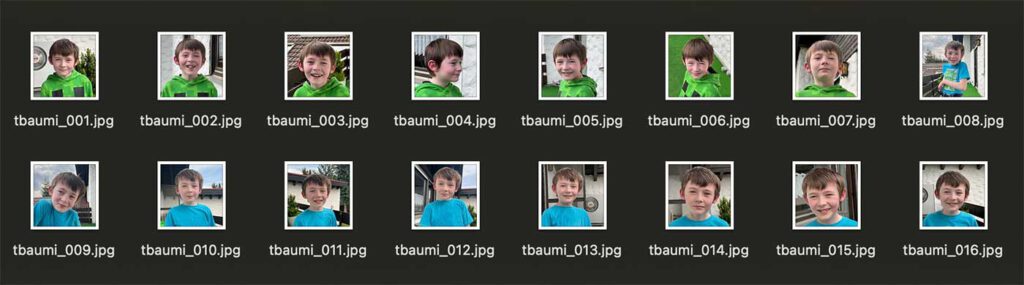
- Create a dataset of 20 high quality, hand-picked images. They should be in focus and show your subject from different angles, half body and close up. (I did some testing by taking pictures with my smartphone and they worked amazingly well). Resize and crop the images to 512x512px. You can use Affinity Photo, Photoshop, CaptureOne or this free online service: https://www.birme.net
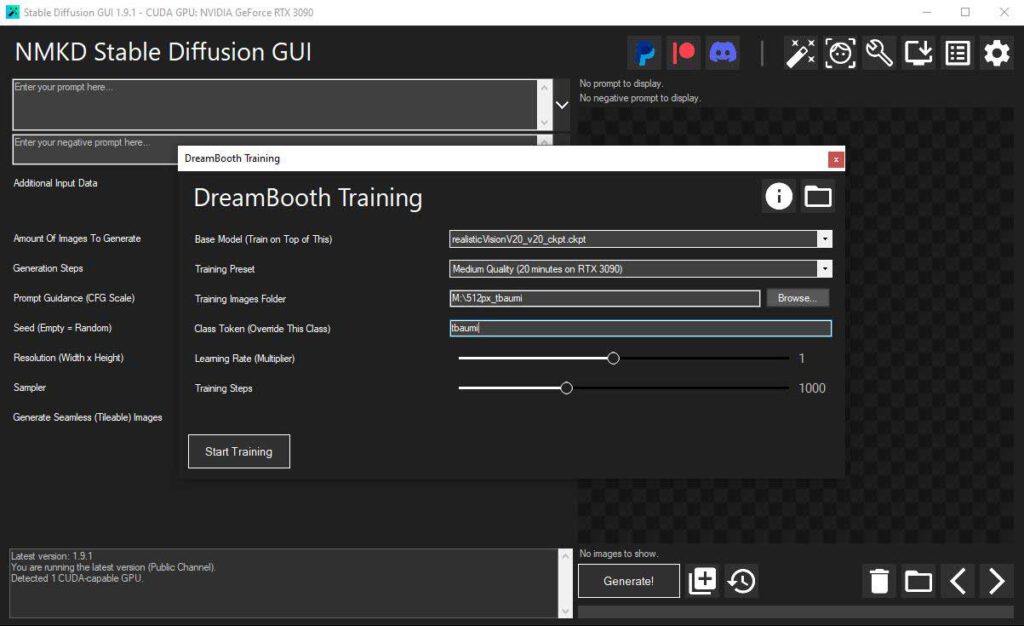
- Start NMKD GUI and go to the Dreambooth training. I use “RealisticVisionV2.0” as the base model, but you can use any model you like. (In NMKD 1.9.1 you still need to convert Safetensor models to ckpt – use the built-in converter in NMKD, it’s very easy).
For quick testing of my dataset I use the training preset “Medium Quality (20minutes on RTX 3090)”. This already gives very good results.
Select the folder with your scaled and cropped 512px images. Add a class token – this is your trigger word that will be used later to create your person or subject. Choose a name that is “very rare” and not already in the base model. Don’t forget to write it down! That’s all – click on “Start Training” and wait.
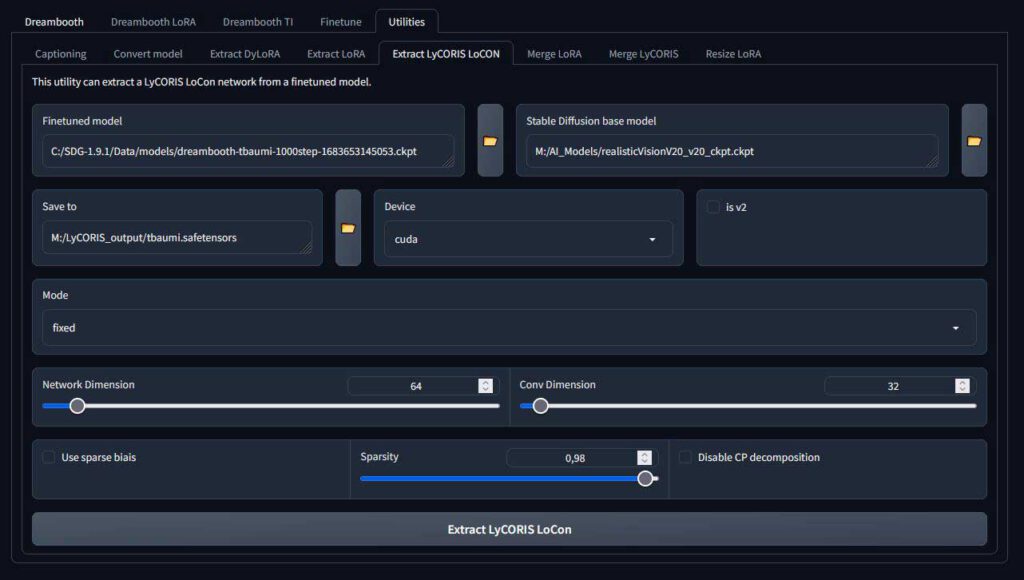
- Inside kohya_ss go to “Utilities > Extract LyCORIS LoCON”. With this tool you can subtract your trained Dreambooth model from the used base model. This way you will get the LyCORIS.
Select the folder of your trained Dreambooth model and that of your used base model. In our case the model we just created with NMKD and the base model of RealisticVision2.0 (the model we converted from safetensor to ckpt). See the screenshot. Specify the location and file name where you want to save your LyCORIS file. I only changed Network Dimension to 64 and Conv Dimension to 32, the rest are default settings.
Device cuda
Mode fixed
Network Dimension 64
Conv Dimension 32
Use sparse biais “unticked”
Sparsity 0.98
Deactivate CP decomposition “unticked”
Click on “Extract LyCORIS LoCon”, it only took 20 seconds on my old system.
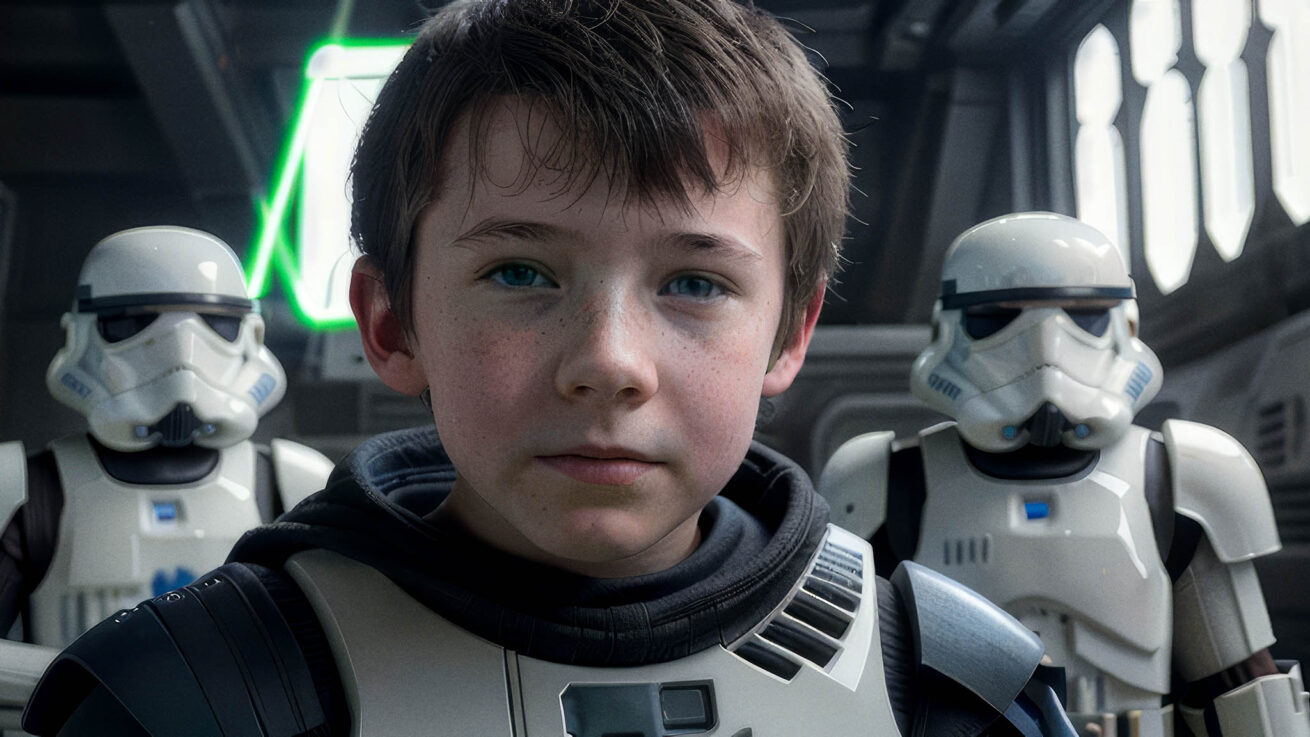
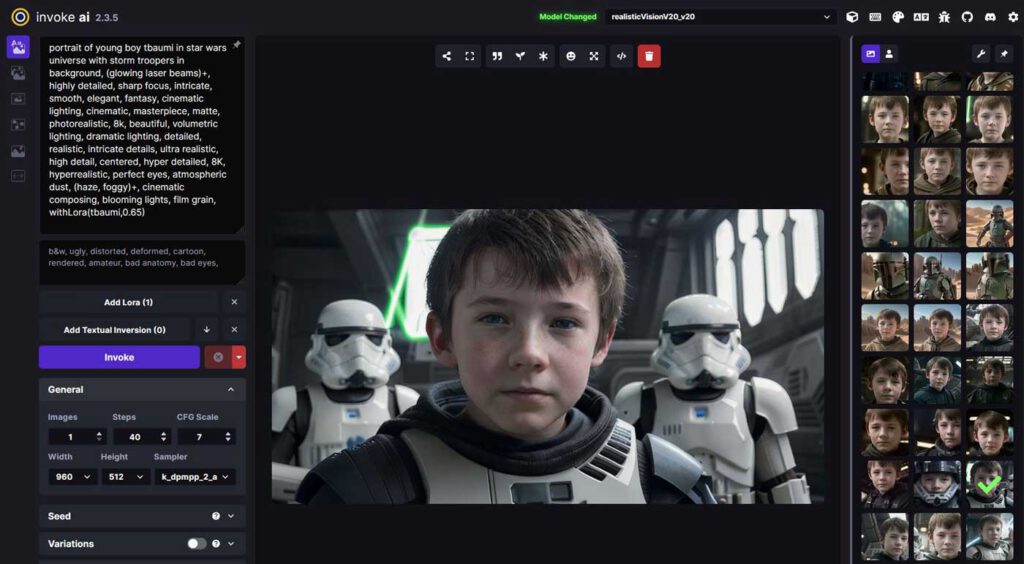
- For creating artificial images, I use “Invoke AI 2.3.5” which is very powerful and easy to use with its unified canvas. Just copy your LyCORIS file into the “loras” folder of Invoke AI. Now you can select it from the drop-down list. To use it, you also need to enter the trigger word from the training, something like this: “portrait of young boy triggerword in star wars universe…”. Hope this helps!
Download locations:
https://github.com/invoke-ai/InvokeAI
https://nmkd.itch.io/t2i-gui
https://github.com/bmaltais/kohya_ss
https://youtu.be/9MT1n97ITaE