
I am by no means an expert in printing with nylon filaments but I gathered as much information as possible from various forums, facebook groups, instagram etc. where people posted photos of amazing high quality prints with carbon nylon filament. To tell you right away: you have to dry your nylon filament first, no matter if it’s fresh out of a vaccum bag – it’s just a waste of time and material. Of course I didn’t believe it myself until I begun to print with it – LOL. I also couldn’t wait and dried it only 8h but I already saw improvements in print quality. Afterwards I put it back into the food dehydrator overnight for another 12h and got superb results! Also keep in mind “always” preheat the nozzle and bed for 5-10 minutes before attempting to print! I do this with all filaments.
My setup:
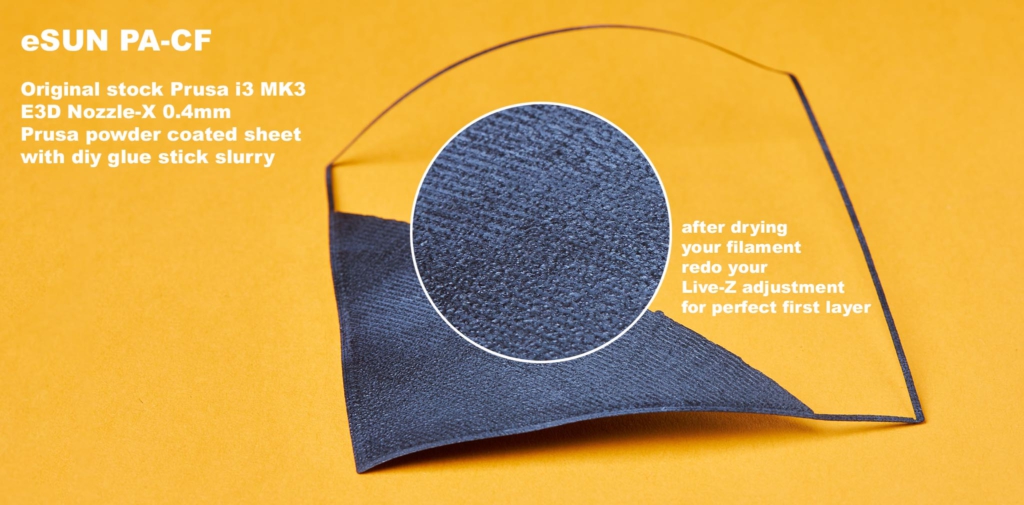
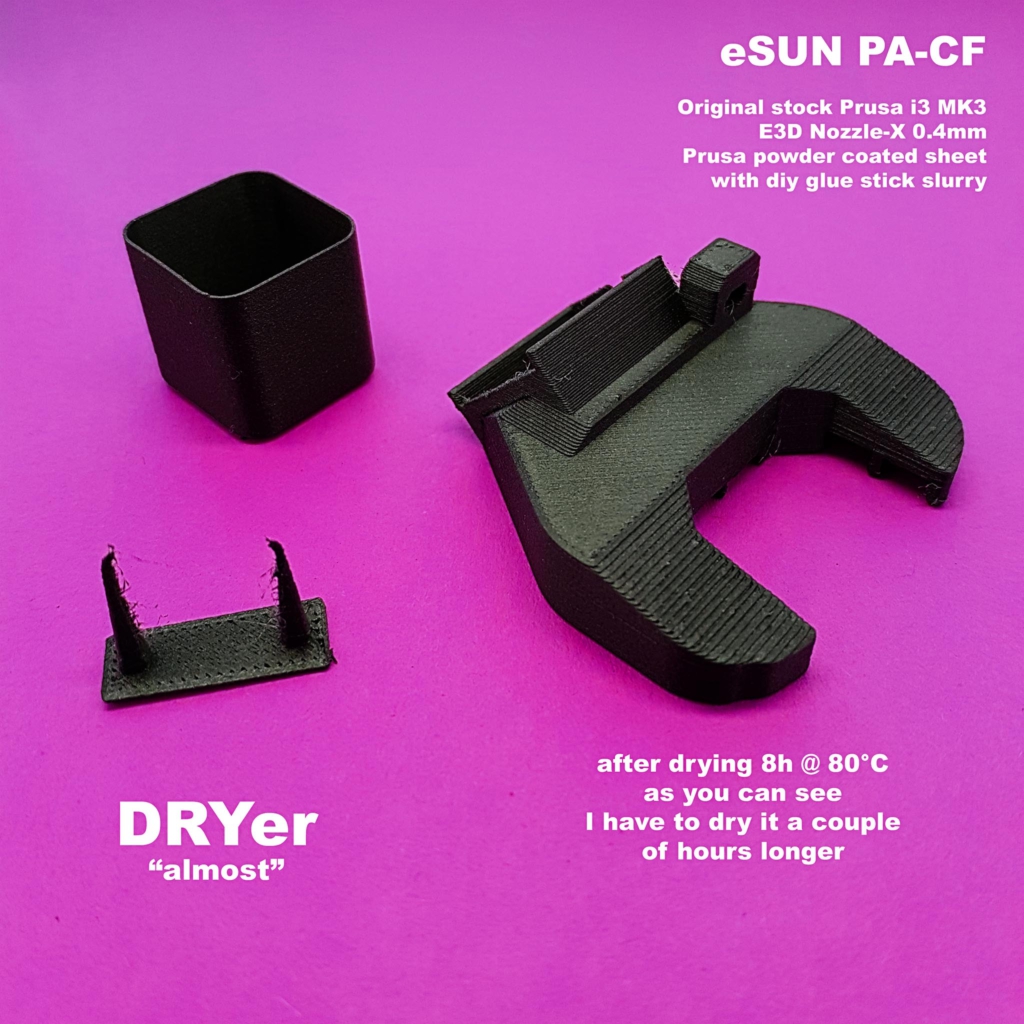
Original stock Prusa i3 MK3 (non S)
E3D Nozzle-X 0.4mm
Prusa powder coated sheet with some diy glue stick slurry applied (explained down below)
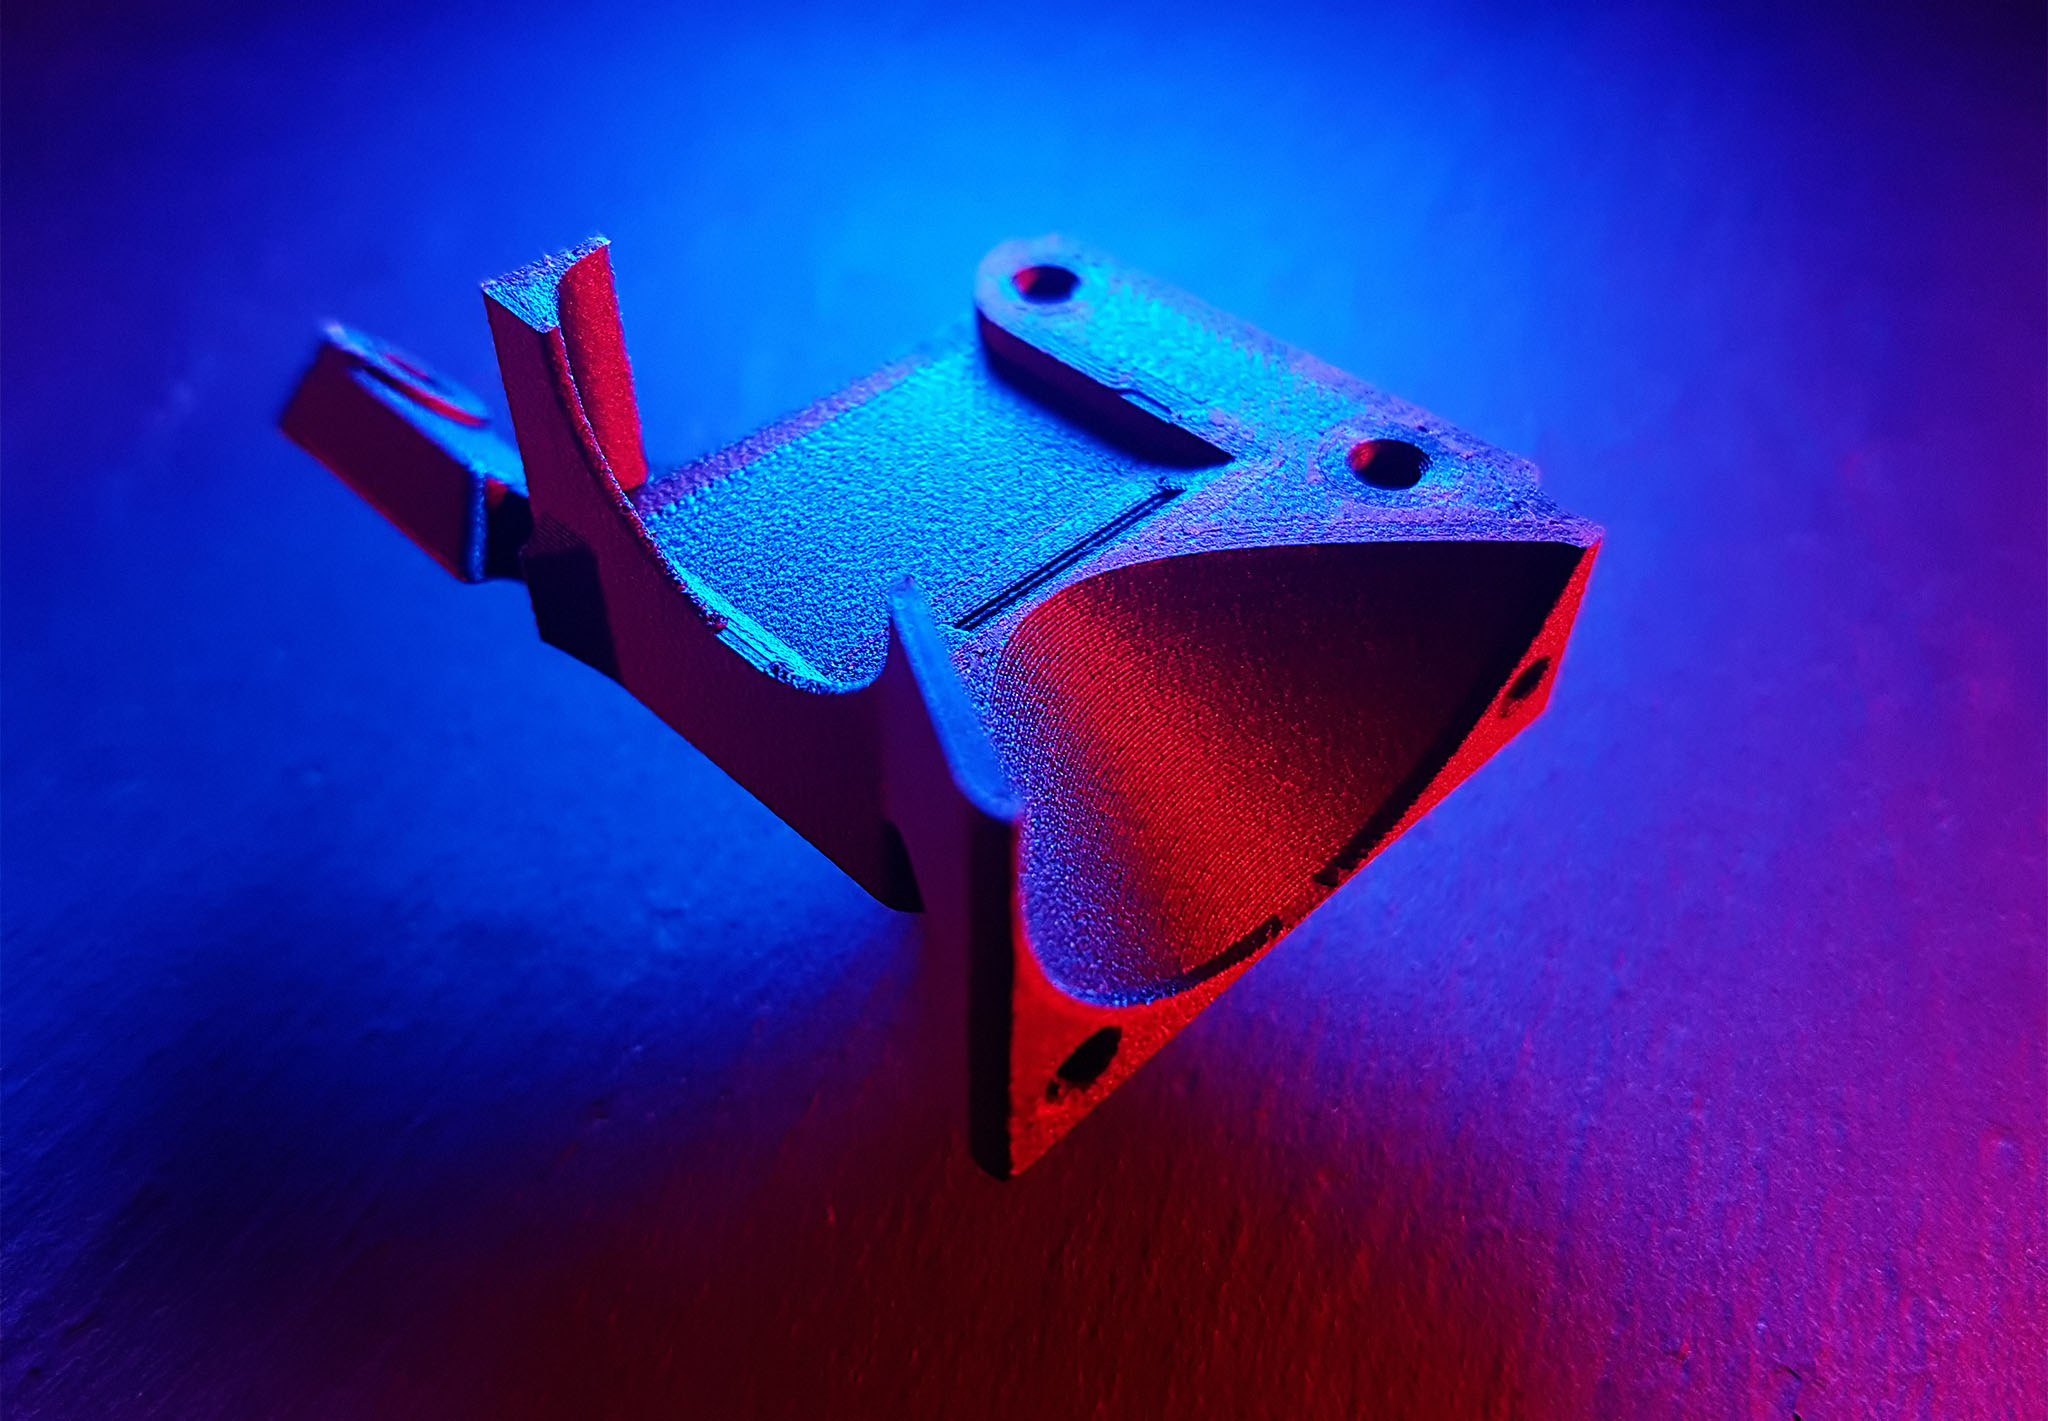
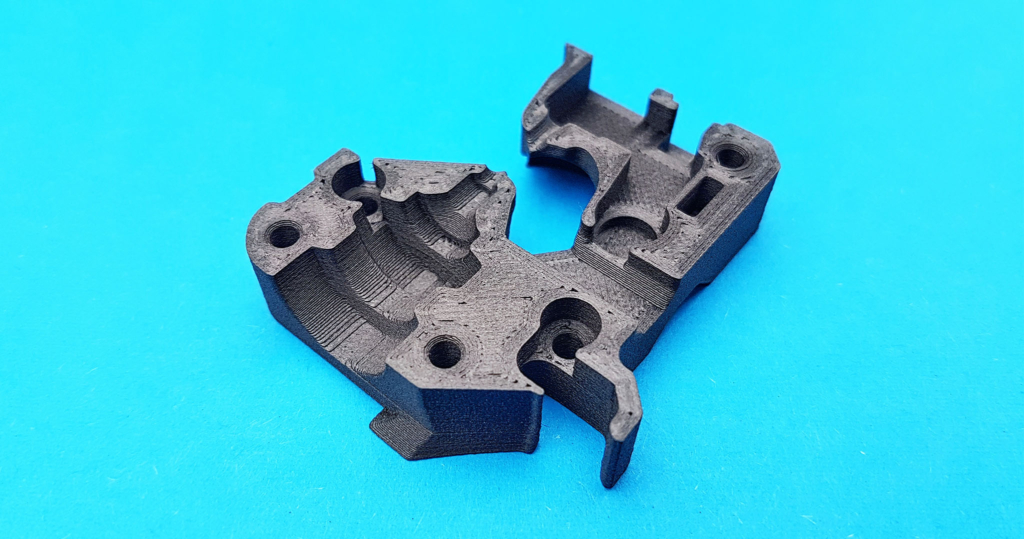
I also just recently upgraded the original fan shroud with the MK3 RHD fan duct rev. C that is pictured in this blog post.
You can get it from here: https://www.thingiverse.com/thing:3249344
Bed adhesion – DIY glue stick slurry, hairspray or special sheet:
Without prior treatment Nylon / PA-CF will not stick to the PEI or powder coated sheet. For perfect bed adhesion I use a small spray bottle where I diluted a little bit of the glue stick that came with my Prusa with 50% water & 50% of 99% Isopropyl alcohol. It’s like a thin slurry. To dissolve it quicker put it on a heater and shake the bottle a couple of times until the glue stick remnants dissolved completely. I spray it on the powder coated sheet and I can use it several times until I have to spray it again. Others use hair-spray on one side of the textured sheet but I didn’t had one here.
If you frequently print PA-CF I would use a 0.5mm thin Garolite (USA) / FR4 or PFCC201 (Europe) sheet. Fix it with a 300x300mm 3M 468MP adhesion tape to a “blank” MK3 steel sheet from Aliexpress. You can also re-use an old Prusa smooth steel sheet that you don’t need anymore. Just remove the PEI and fix the 3M 468MP adhesive tape + the 0.5mm thin Garolite sheet to it.
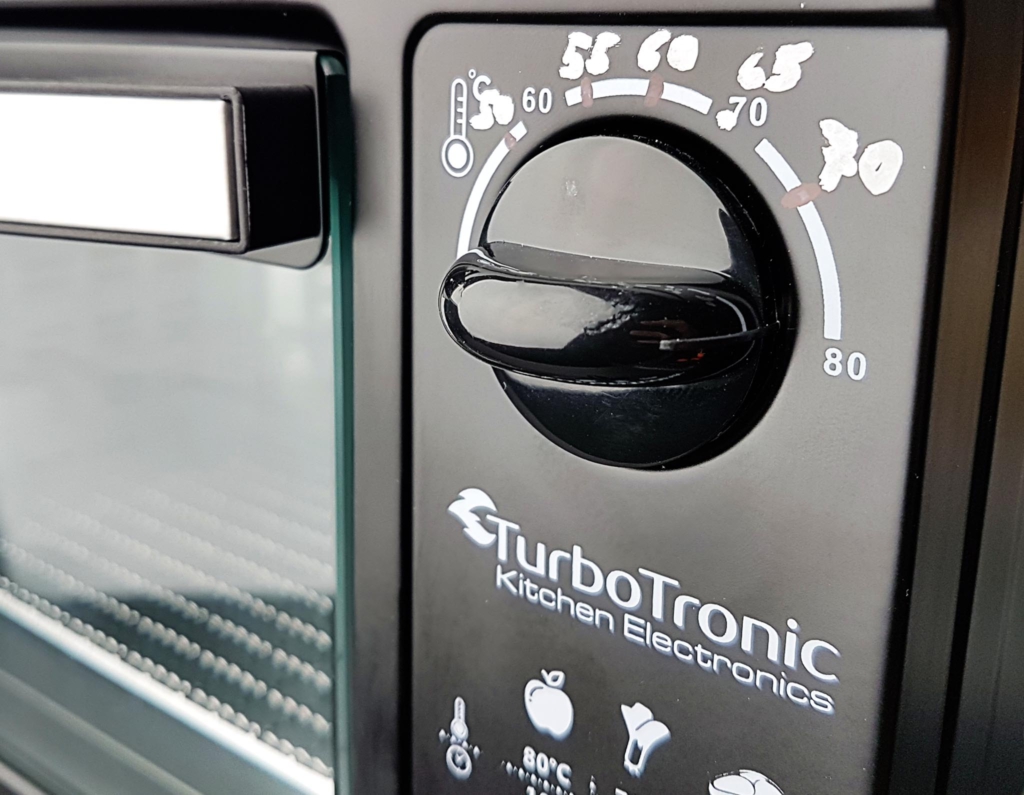
Food dehydrator:
I also bought 2x cheap metal food dehydrators from amazon that go up to 80°C. In the small one with 14 Liter / 350W there is space for 1x 1 kg spool. The temperature controller is analog and below 80°C it is not very precise if you plan on using it on PLA, PETG, ABS etc. you have to measure it with an external digital thermometer and make new markings on the dial. TurboTronic TurboWave Bio Dörrgerät 14 L (TT-FD14): 14 Liter Food Dehydrator / They’ve also made the small one with digital controller too here: TT-FD14-D with digital controller
The bigger one 30 Liter / 650W with digital timer and controller holds up to 4x 1 kg spools and is much more precise. TurboTronic TurboWave Bio Dörrgerät 30 L (TT-FD30-D): 30 Liter Food Dehydrator
I may earn a commission on qualifying purchases (at no extra cost to you)
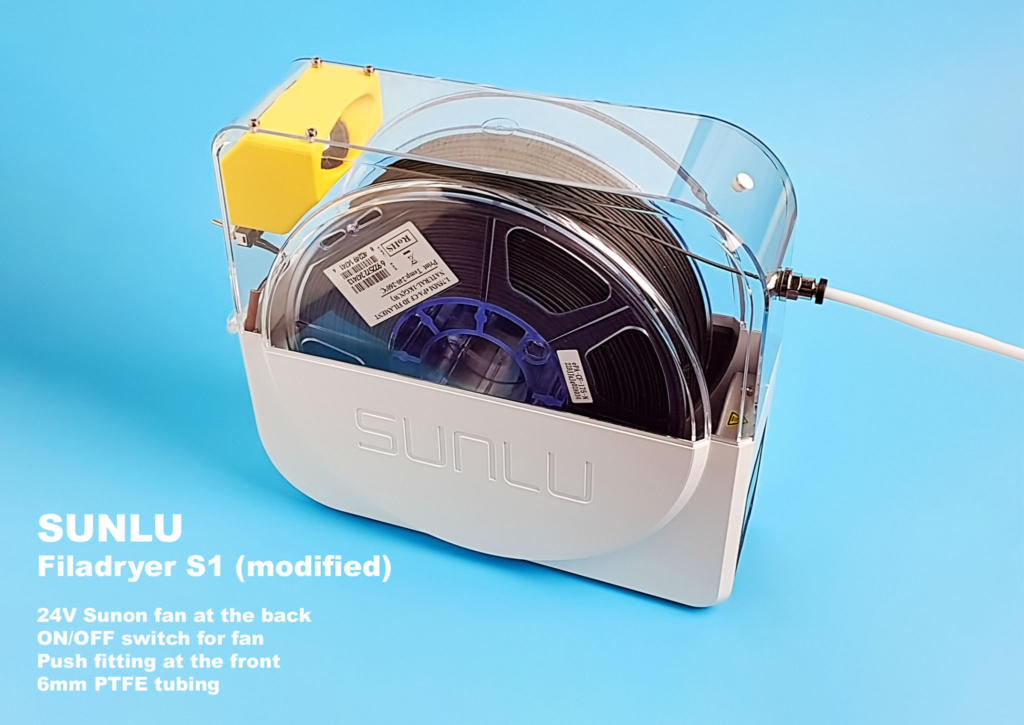
Filament dryer:
After drying, I put the filament spool into the SUNLU Filadryer S1 (Link here: modified with a fan + 6mm push fitting + PTFE tube) set it to it’s maximum 55°C and print directly from it. This makes sure no moisture gets into the filament when printing for longer times. Thanks to MidLifeHiker for the S1 Fan mod design on thingiverse!
So, let’s start by drying your filament first:
Open your newly bought spool of filament but before doing anything with it, dry your eSUN PA-CF filament for minimum 12h @ 80°C in a food dehydrator. It’s absolutely necessary no matter if it’s a new roll of filament. Several guys on the prusaprinters forum (link down below) did some great extensive testing and found out that Nylon filament accumulated 2g of water in a period of 1 month and it was inside a vacuum sealed bag with desiccant. Only double bagging with silica packs made a huge improvement.
Here is the link to a very good discussion about drying times and temps:
https://forum.prusaprinters.org/forum/original-prusa-i3-mk3s-mk3-general-discussion-announcements-and-releases/drying-times-and-temps-in-dehydrator/paged/4/
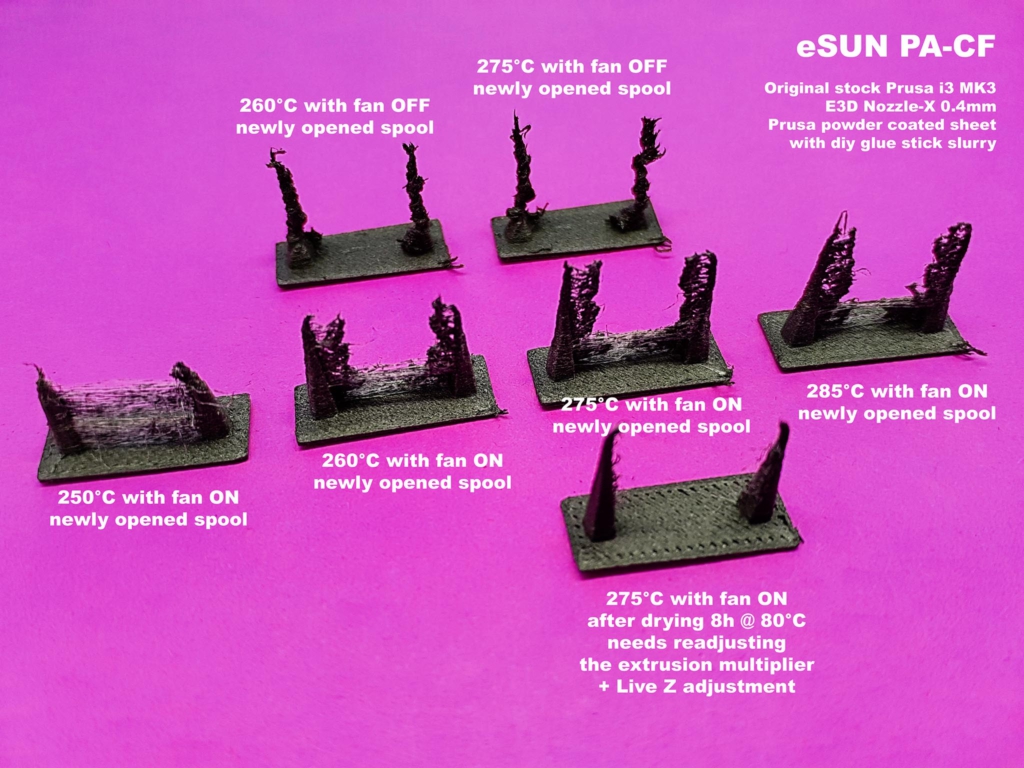
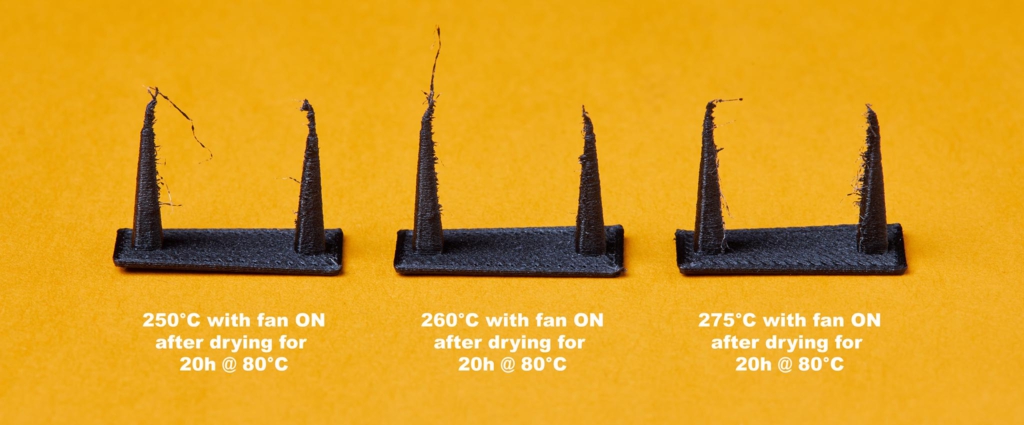
Print ultrafast stringing test:
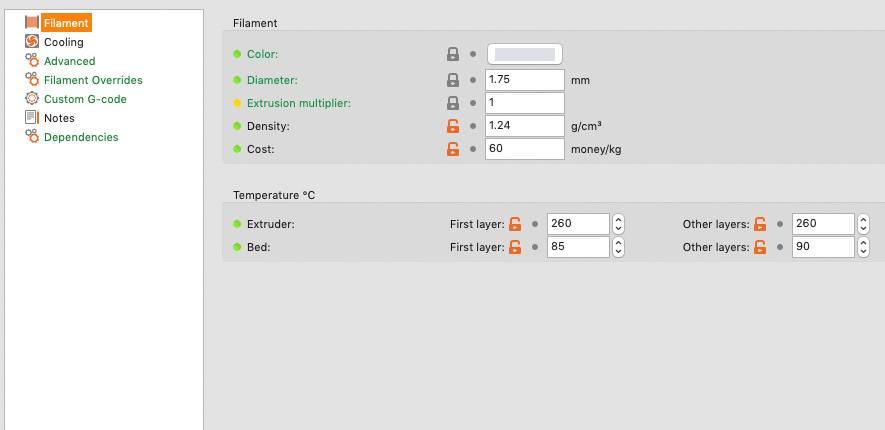
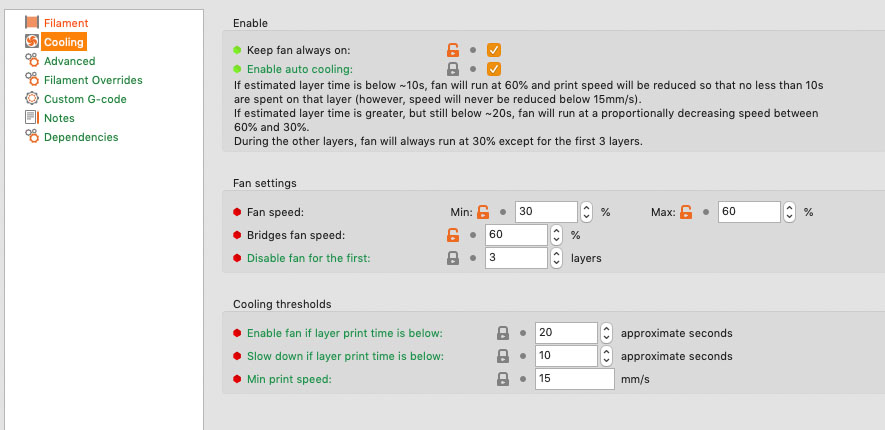
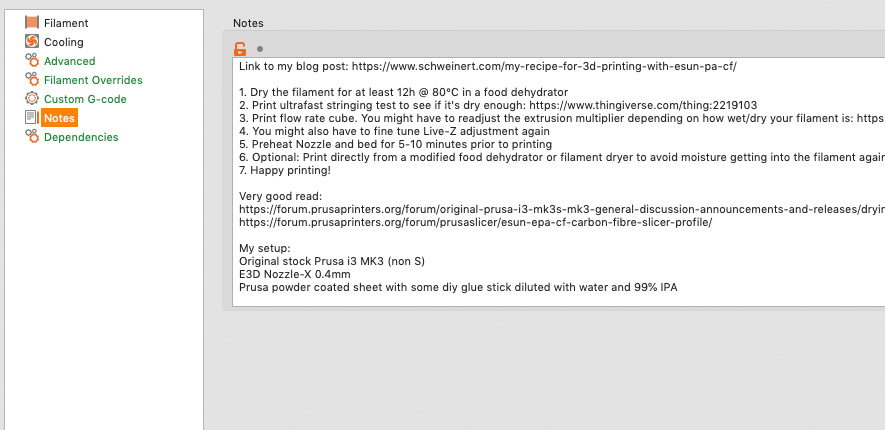
After you dried the filament start printing the ultrafast stringing test to verify if it’s still wet. Don’t be afraid you have to print only 1 piece. I printed many of them to see if the temperature changes anything. Use my modified “Fiberthree F3 CF-PRO” preset in Prusa Slicer or change it yourself using the data below from the Screenshots. For print settings I’ve used the 0.15mm QUALITY preset but you can use anything you want. Changes in the profile where made only to the section “Filament Settings” in Prusa Slicer. There are only cooling and filament changes no fancy g-codes whatsoever. As you can see I should have dried the filament a little longer but I couldn’t resist to finally print with it 🙂
My modified Fiberthree preset for eSUN PA-CF: Download (will update it with new settings once I printed way more parts with it. Download the latest version if you want the newest. V1.0 works great though)
Ultrafast stringing test: https://www.thingiverse.com/thing:2219103
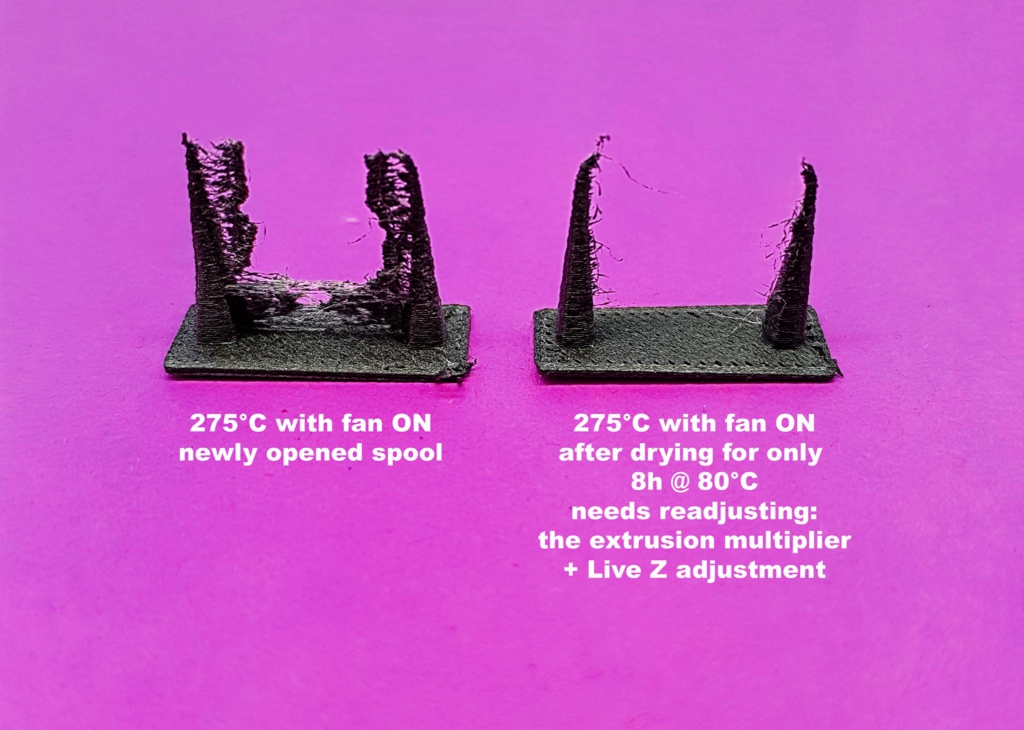
Print flow rate calibration cube:
When no more stringing is visible, move on and print the flow rate calibration cube in “vase mode” and use their calculator to calculate your extrusion multiplier. Keep in mind that the extrusion multiplier is completely different when the filament is wet or really dry. When I opened a new roll of filament (and it was wet after doing the stringing test) I had to use a multiplier of 0.85 but when I dried it for 8h @ 80°C I had to change it to 1.00.
Flow rate calibration: https://www.3dmakerengineering.com/blogs/3d-printing/flow-rate-calibration
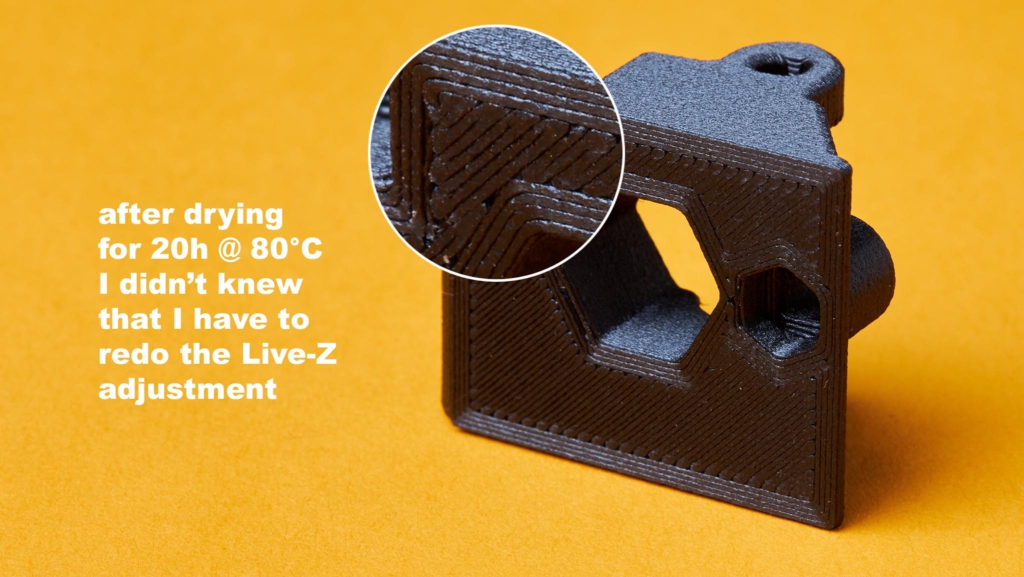
Redo your Live-Z adjustment:
You might also have to redo your Live Z adjustment when the filament is dry. At least for my printed parts I saw there where visible gaps in the first layer when I used the same settings with dried PA-CF filament.
Preheat Nozzle and print from a filament dryer:
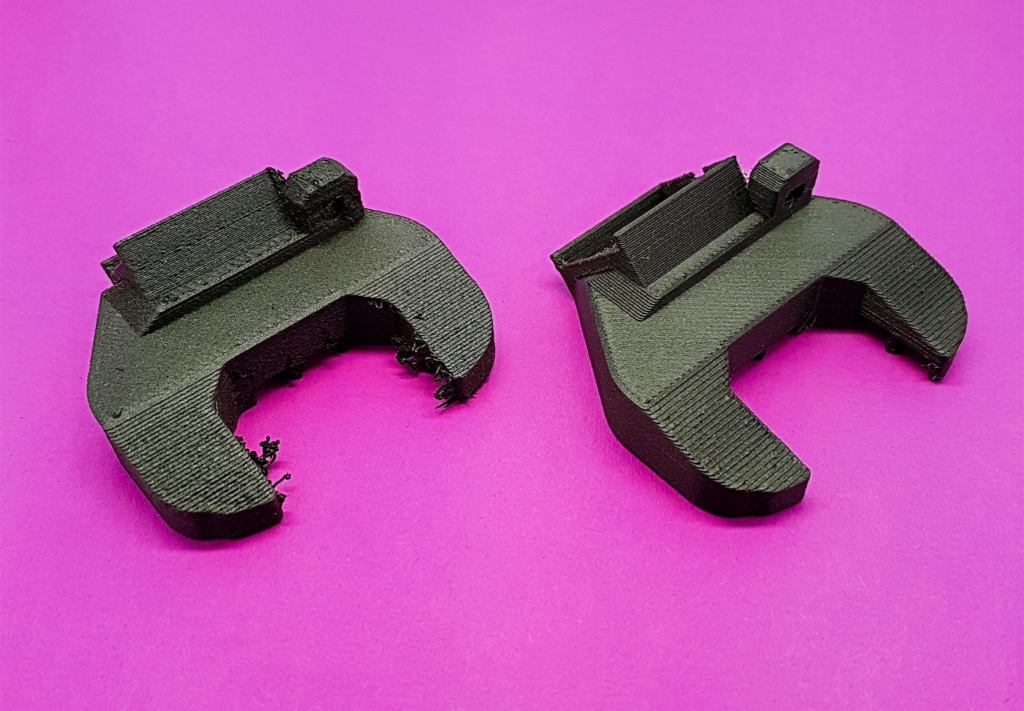
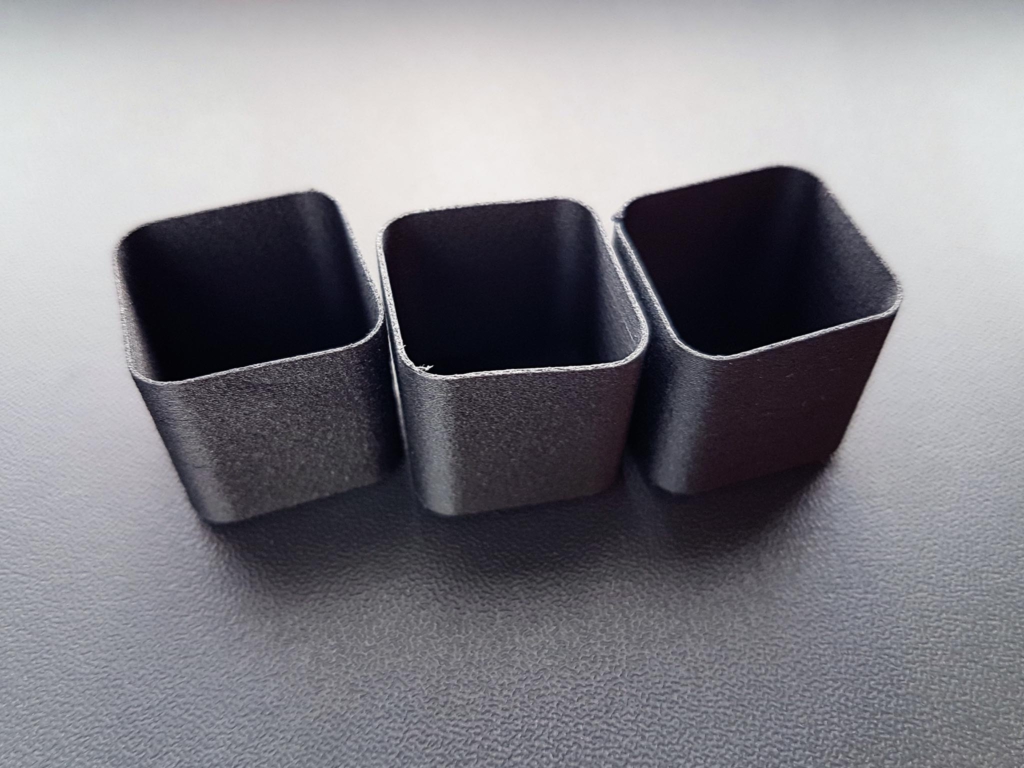
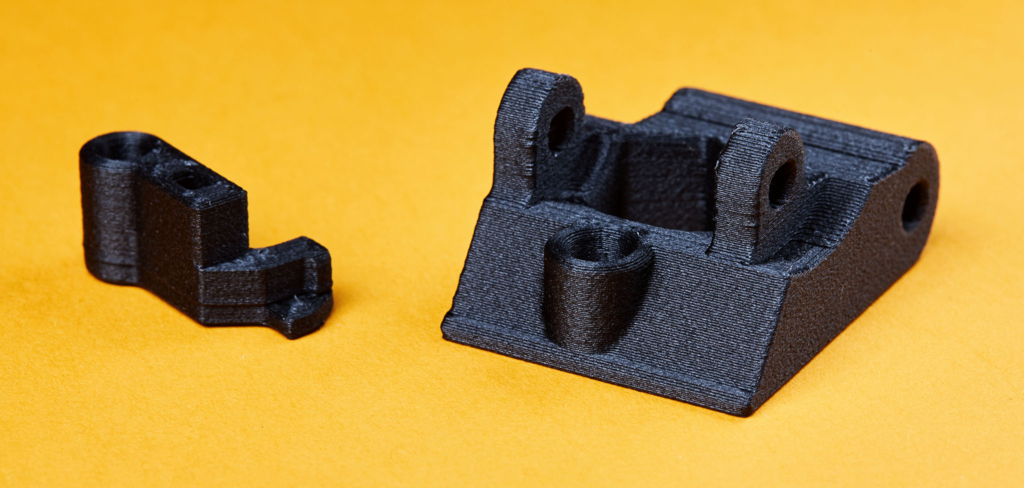
Now when everything is set, start to print your first part. Don’t forget to preheat the nozzle and bed for 5-10 minutes. If you have a filament dryer print directly from it to avoid moisture getting back into the filament while you print! I also noticed that PA-CF parts printed with dry filament are a little bit darker and have a slight glossy finish to them. When the filament is wet they look kind of dull and rough. If you follow these steps you should get perfect results. Happy printing!


How to store hygroscopic filaments:
Keeping filament in an airtight container is a must to prevent the absorption of humidity from the air. I use the double bagging method. After printing I put the filament spool with a desiccant pack into a ZipBag 30x30cm. This ZipBag comes then into an airtight plastic container (like Lock & Lock HPL834 container) with another pack of desiccant. According to the above tests in the discussion this reduces the moisture absorption depending on your environment from 2g per month to only 0.5g per month. Anyhow at some point you have to dry your filament again.
PA-CF parts too brittle:
In some cases you have to hydrate your PA-CF 3D printed parts or they will be too brittle and could break upon assembly. Big companies like Molex doing the same with their nylon electronic connector parts. They moisturize them to avoid breakage.
Usually the parts absorb enough moisture and stabilize after a couple of days in the open but that really depends on your environment. They will get a little bit more flexible too. More info on how to do it properly in my next blog post.
Also a very good read about printing eSUN PA-CF:
https://forum.prusaprinters.org/forum/prusaslicer/esun-epa-cf-carbon-fibre-slicer-profile/
[…] it behaves in summer but if it does not exceed 40°C I won’t worry at all. Update: I printed Nylon PA-CF with it in summer and the temperature maxed out at 44°C. Hot air can easily escape through the […]
[…] Odličen blog z navodili za tisk esun PACF filamenta s tiskalnikum Prusa : https://www.schweinert.com/my-recipe-for-3d-printing-with-esun-pa-cf/ […]