
On my original Prusa MK3 (assembled by Prusa) I had a bed variance of 0.6mm across the whole bed. The afterwards integrated 7×7 mesh bed leveling did work but for my work I always found that the bed needs to be as flat as possible in the beginning. Agreed you won’t notice it on smaller parts but when printing bigger functional parts across the whole surface and need the bottom of the parts to be as flat as possible i.e. – for assembly you definitely notice it. So I did the famous “Nylock Mod” some time ago. It was very good and I got perfect first layer. On the other hand it was a pain in the ass to lock the nuts with a small 5.5mm wrench under the magnetic bed and inside an enclosure. Also after a couple of months the calibration went bad because the screws still started to turn because of the vibration. Readjusting was a headache. Btw. others also use flat wave springs with very good results, I never tried it though – check the links on the bottom of this page!
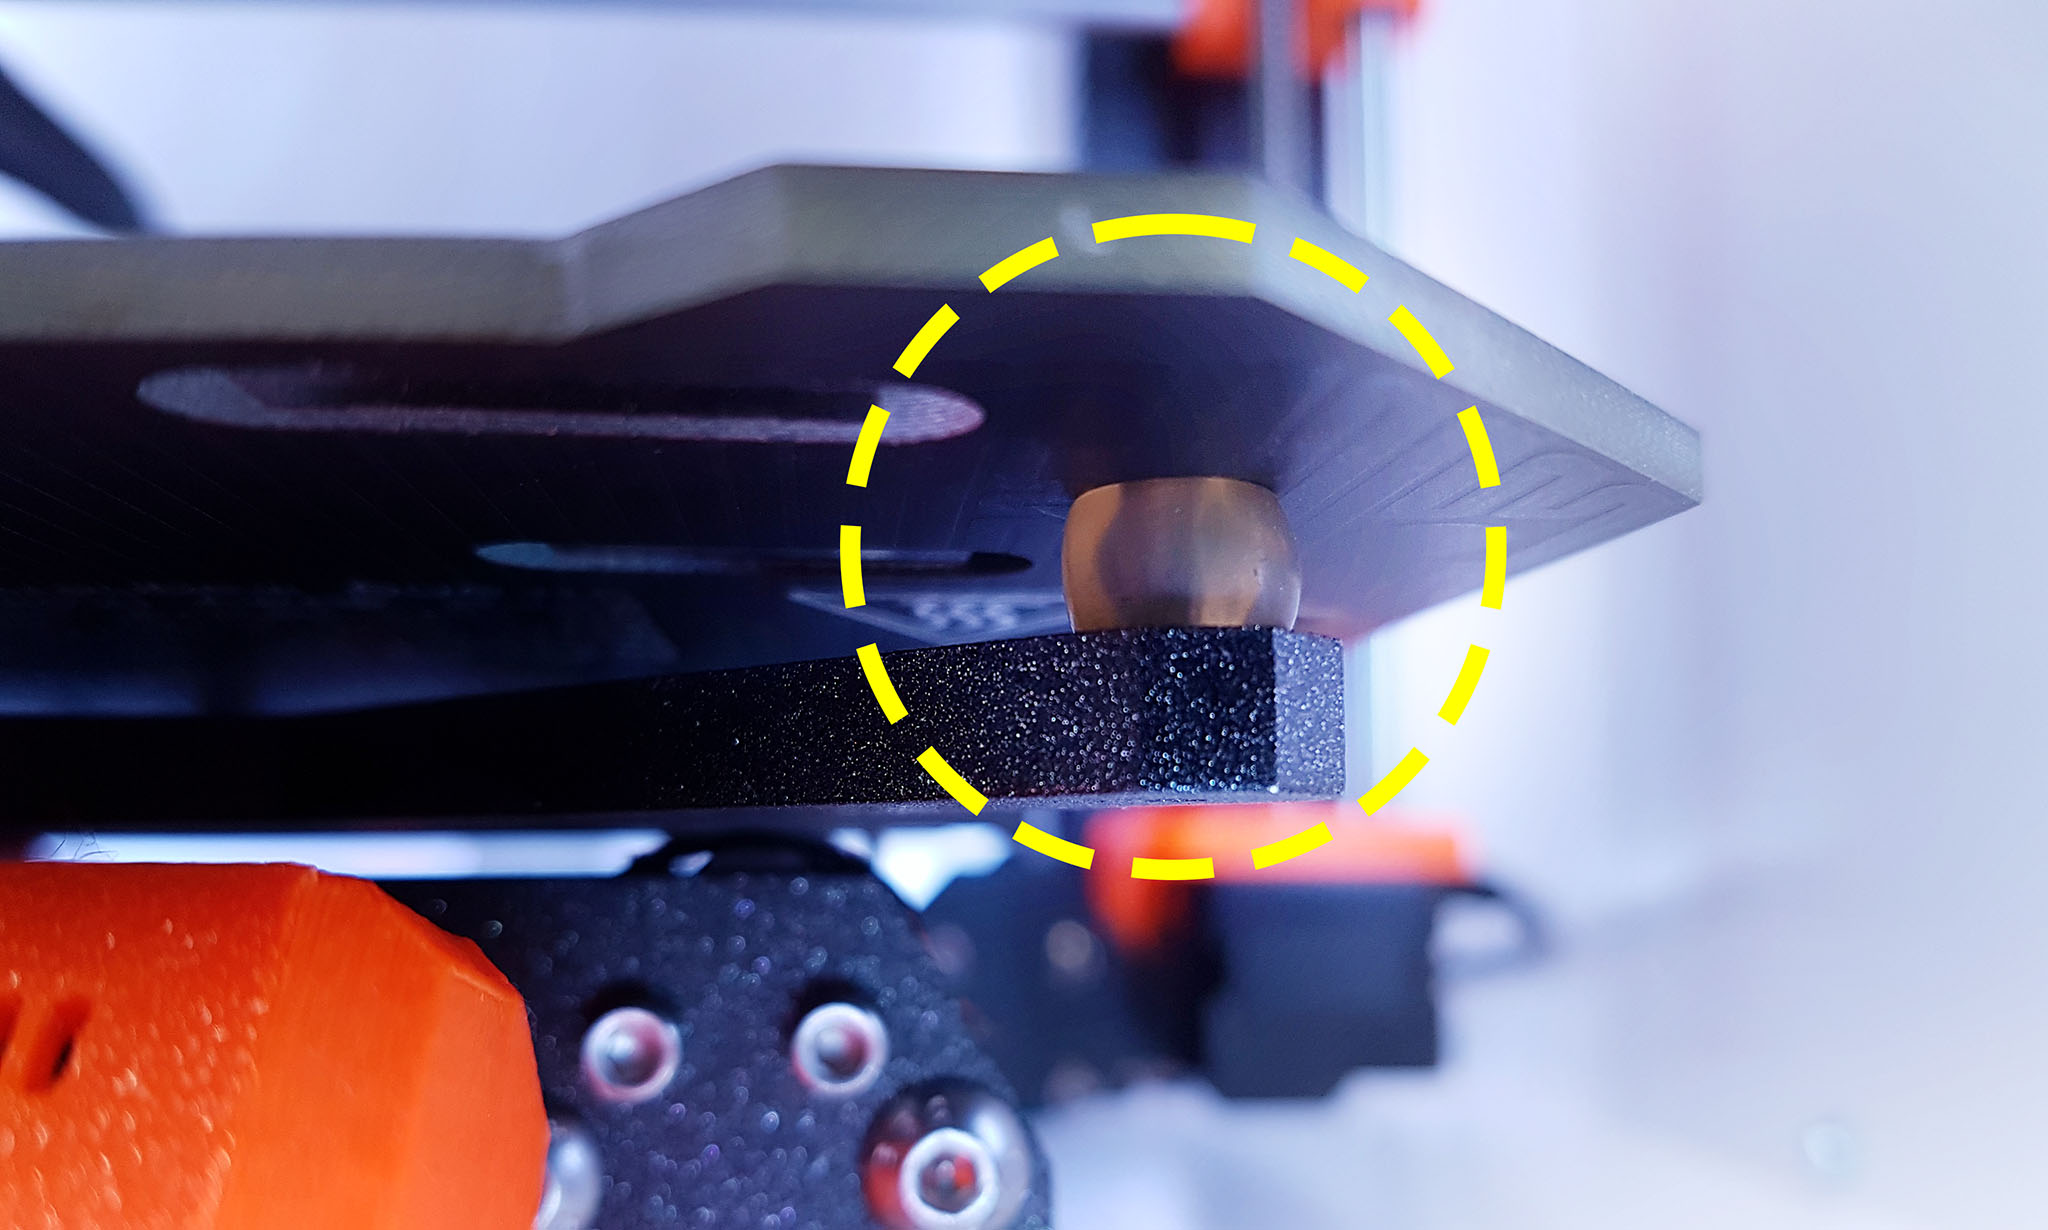
I found this interesting discussion about the silicone bed level mod on prusaprinters forum that promises to solve the problems and avoid any disadvantages of the nylock mod. Basically you use a high temp piece of thick silicone tubing made for automotive parts and use it instead of the metal spacer. You cut it’s length to 10mm and squish it with the screws to 6mm. Readjusting is a breeze.
Prusa Mini Silicone Bed Leveling Mod:
https://forum.prusaprinters.org/forum/user-mods-octoprint-enclosures-nozzles/prusa-mini-silicone-bed-leveling-mod/
I wanted to adapt it for my Prusa MK3. So let’s see if that works out.
Bill of materials:
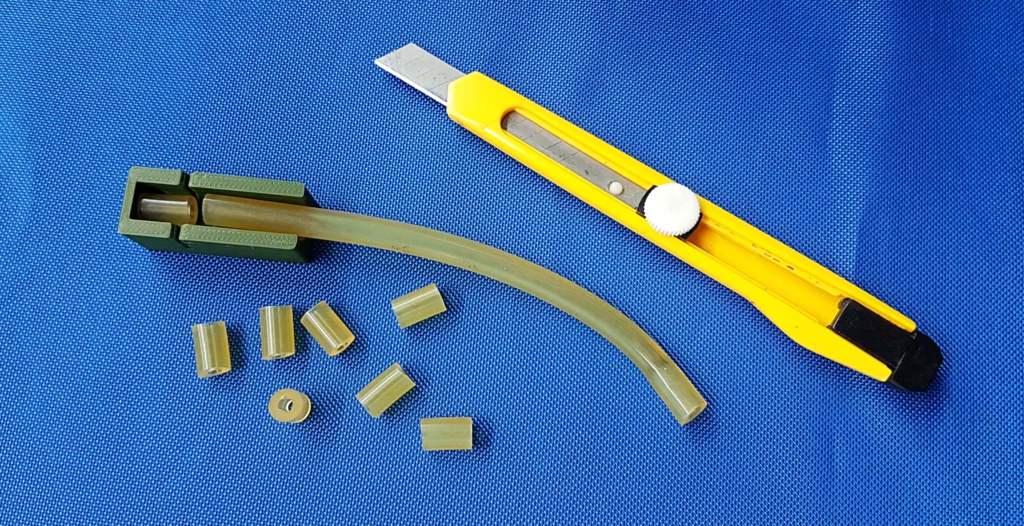
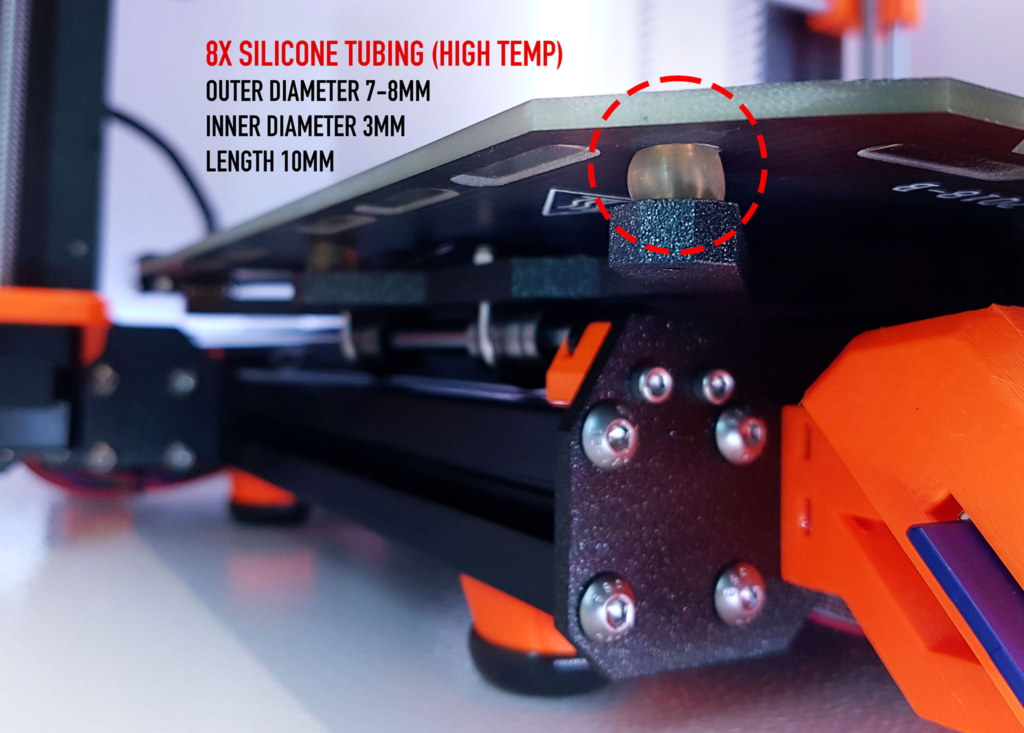
8x silicone tubing outer diameter 7-8mm, inner diameter 3mm, length 10mm (high temp for automotive parts)
Tube cutting jig (optional): https://github.com/PaulGameDev/PrusaMK3_Silicone_Leveling
Nylock spacer tool (optional): https://www.thingiverse.com/thing:4140461
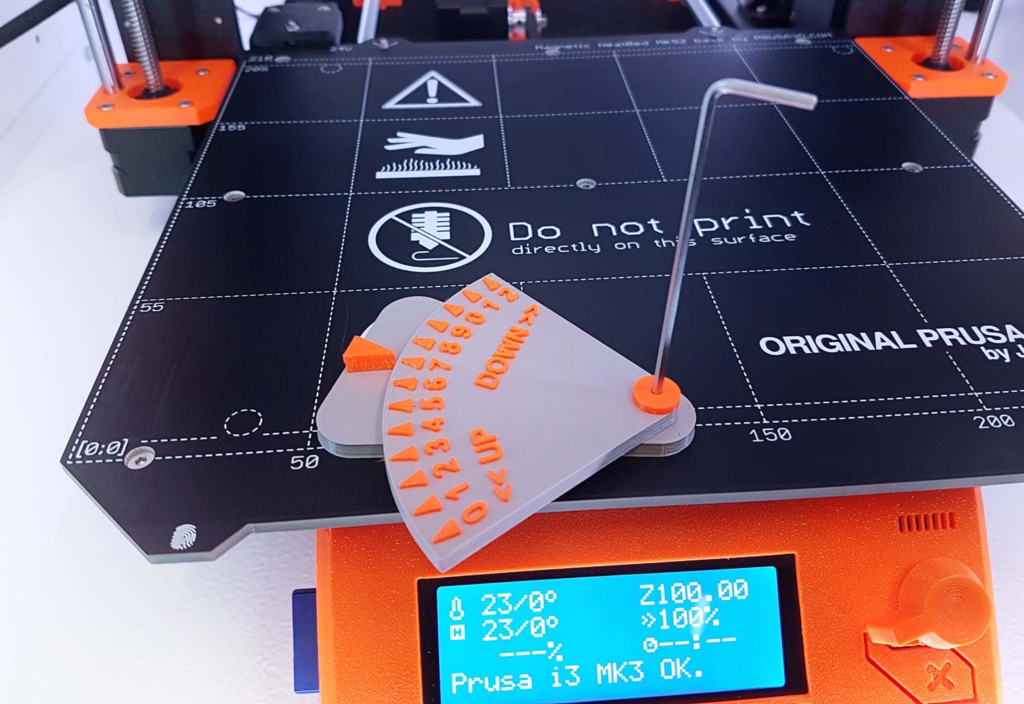
Gauge for Prusa MK3 Nylock Bed Leveling Mod https://www.thingiverse.com/thing:3499014
Octoprint Plugin: https://github.com/scottrini/OctoPrint-PrusaLevelingGuide/
Octoprint Plugin: https://github.com/PrusaOwners/OctoPrint-PrusaMeshMap
Octoprint on Raspberry Pi or install it like me on an old PC. I used this guide here to install Octoprint on my PC: https://community.octoprint.org/t/setting-up-octoprint-on-windows/383
First you will need some high temp silicone tubing used for automotive parts. I luckily found a piece in our garage. Outer diameter 7-8mm and inner diameter 3mm. That works perfectly with the M3 screws used in the Prusa MK3. I used the tube cutting jig to cut 8 pieces each 10mm in length.
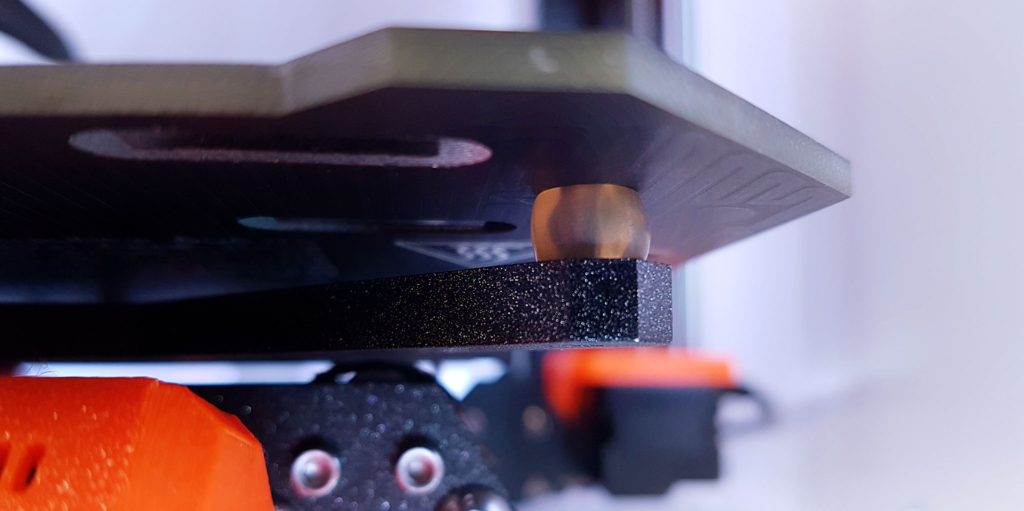
Next I’ve removed all 9 screws from the heatbed and the underlying metal 6mm spacers. I put a piece of tubing over each thread on the Y-carriage. Except in the middle! There I put the 6mm long metal spacer back. I placed all screws back into the PCB. Now I carefully aligned the hanging screws to meet the tubing on the Y-carriage, starting from back to front. It sounds tricky but it worked surprisingly easy. Way more easier than the Nylock mod.
Now you can start to tighten each screw a little bit until it grabs into the thread – you have to squish the tubing a little bit. Use the 6mm nylock spacer tool to verify if you have the same distance as the metal spacer in the middle. Or just use anything that is 6mm in thickness – preferably something that will not be attracted by the neodymium magnets under the heatbed.
I started Octoprint and used the leveling guide to measure my heatbed with the smooth steel sheet on. (Always do the measurement with the steel sheet placed on the heatbed!) Heatbed temperature was turned off since I wanted to get a rough calibration in the first place without burning my fingers. Later on I did it again with heatbed turned on @ 85°C.
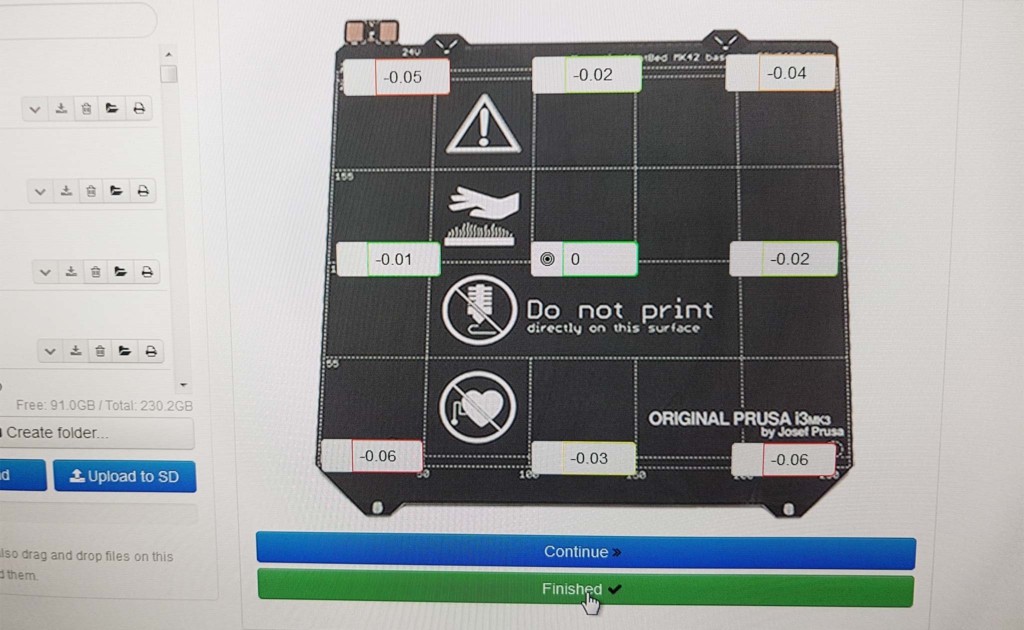
With the 3d printed gauge it was very easy to get a good calibration. Now that I have a rough bed variance of 0.2mm I redo the leveling guide but this time I preheat for the material I mostly use like PETG @ 85°C. Put the steel sheet back on the heatbed and wait a couple of minutes until the temperature is stabilized.
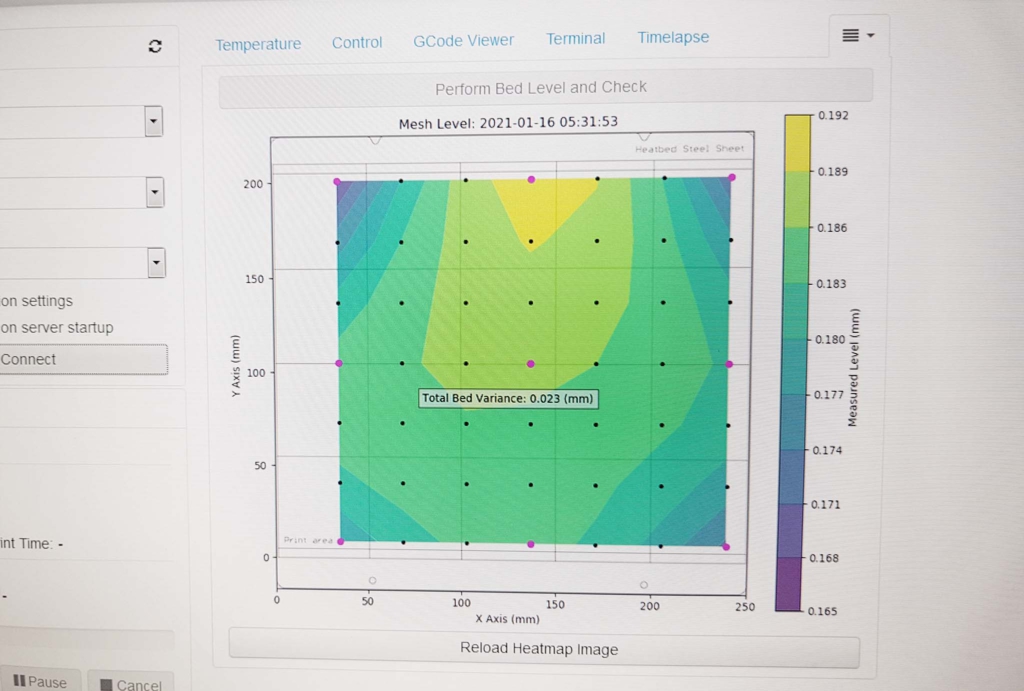
Keep in mind the steel sheet and heatbed is now hot! Quickly readjust with the 3d printed gauge (PETG) the values from the leveling guide. I did this procedure 3 times until I got a constant value and then I clicked on finished. Do a final bed level check with the prusa mesh map plugin it uses 7×7 points and check the bed variance. I’m satisfied with the variance and will stop here. Don’t forget to re-adjust your Live-Z now for your specific sheet.
The values look really good but in reality they will of course change if you touch or move the printer around. Then you have to redo the bed leveling.
Sources:
https://github.com/bbbenji/PMSBLM (Prusa Mini Silicone Bed Leveling Mod)
https://forum.prusaprinters.org/forum/user-mods-octoprint-enclosures-nozzles/prusa-mini-silicone-bed-leveling-mod/
https://www.reddit.com/r/prusa3d/comments/bp440f/full_guide_to_doing_nylock_mod_if_you_havent_you/
https://www.youtube.com/watch?v=hDv73AdiBqM
https://www.youtube.com/watch?v=NJSWhqmYgJo
https://forum.prusaprinters.org/forum/original-prusa-i3-mk3s-mk3-user-mods-octoprint-enclosures-nozzles-…/fix-bed-variance-warp-using-flat-springs/
https://www.thingiverse.com/thing:4061929 (Prusa silicone springs mold)