
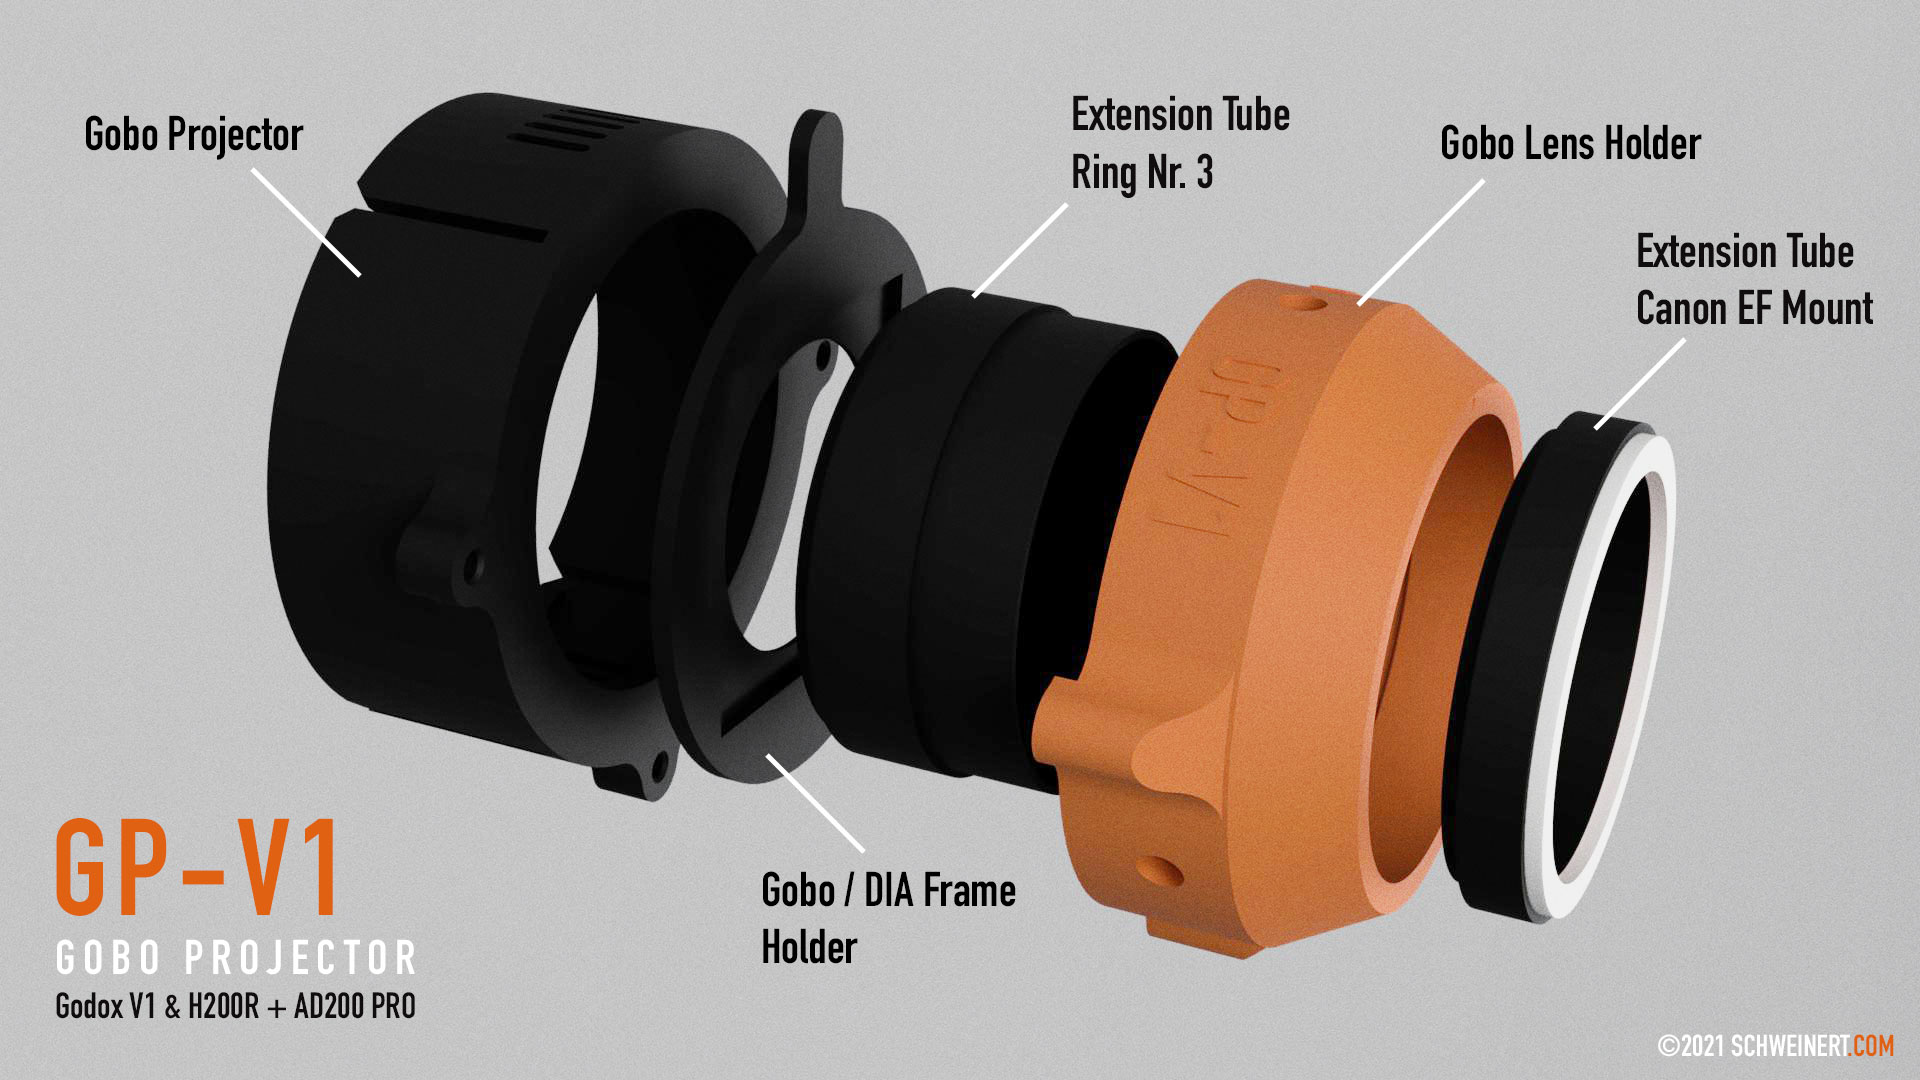
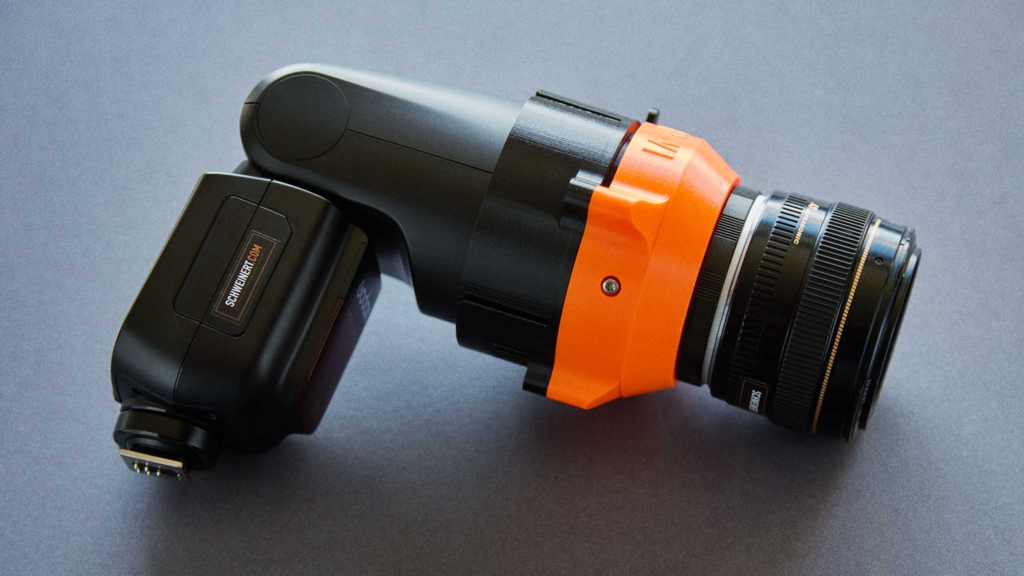
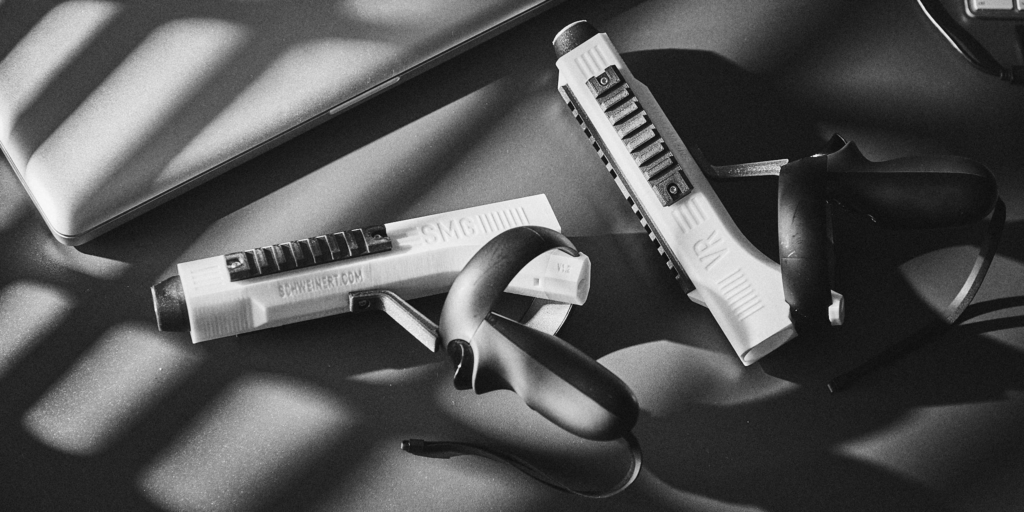
I wanted a small and compact gobo projector for my flashes Godox V1 and AD200 PRO with H200R round head but there was nothing available. So I decided to build it myself. There is also enough space inside the housing to add a gel and diffusion filter from the Godox AK-R1 kit if needed.
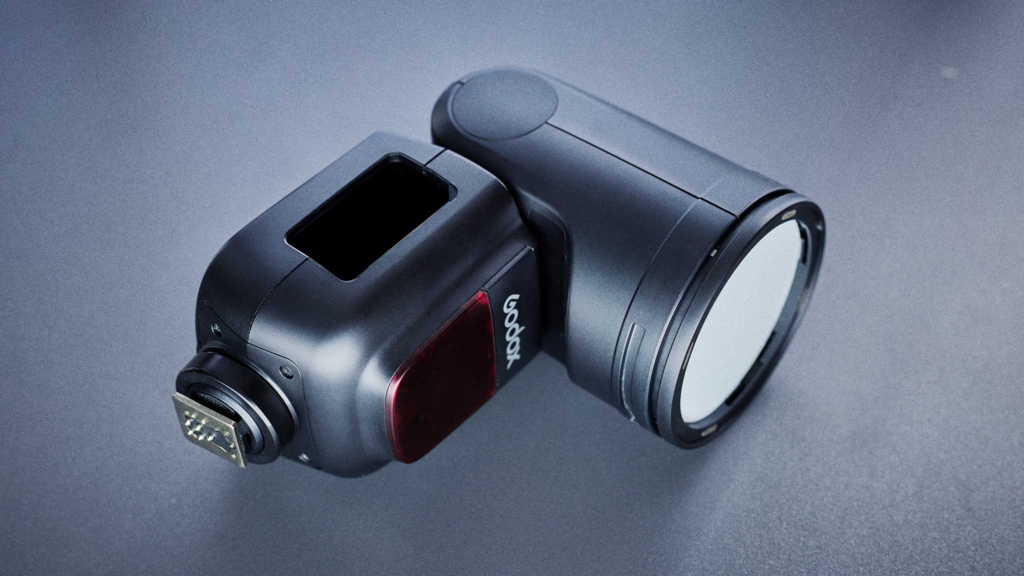
For previewing and focusing the LED inside the H200R works perfectly because it’s really powerful and centered. The glass element is also already diffused on the H200R. The LED from the Godox V1 is off-centered and it will not work for previewing the gobo but with some trial and error triggering the flash you can still set it on your subject. The Godox V1 works best if you use a diffusion filter to soften the light from the fresnel lens.

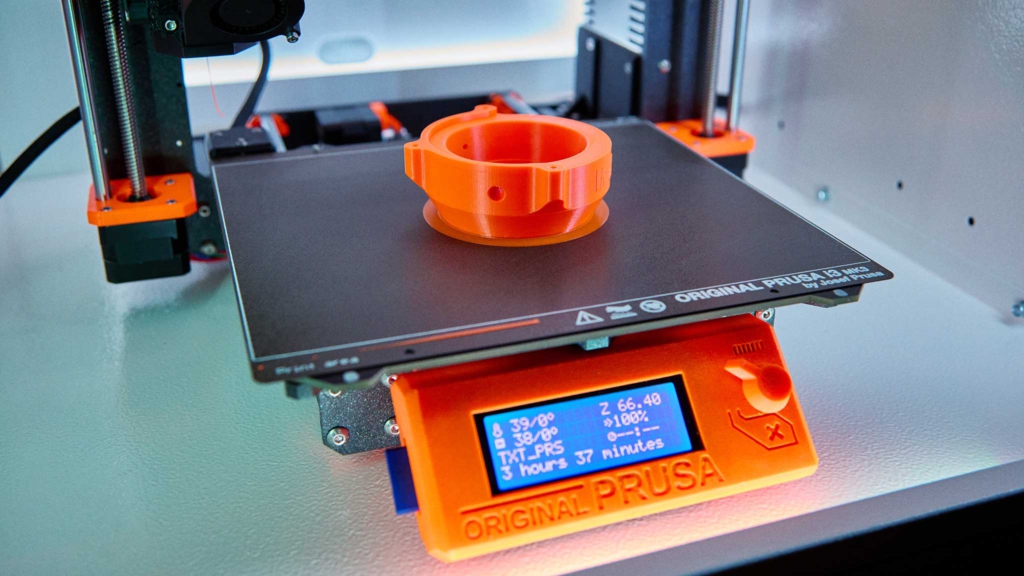
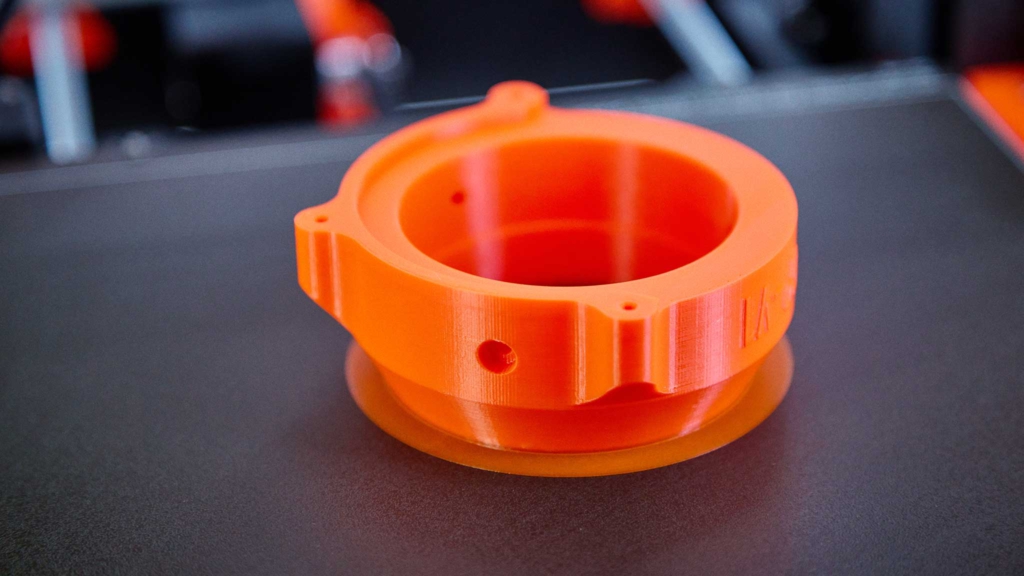
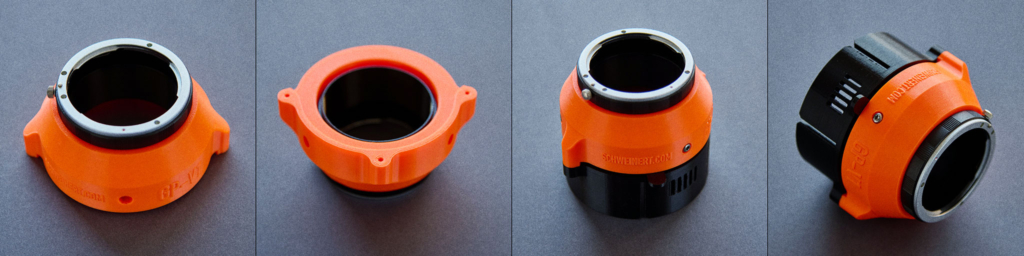
I printed most of the parts from Prusament PETG Jet Black. For the front part I’ve used Prusament PETG Orange to give it a little bit of color and it won’t affect the light because the inside is covered by the extension tube. You will also need a cheap Canon EF extension tube or macro tube from ebay or amazon.
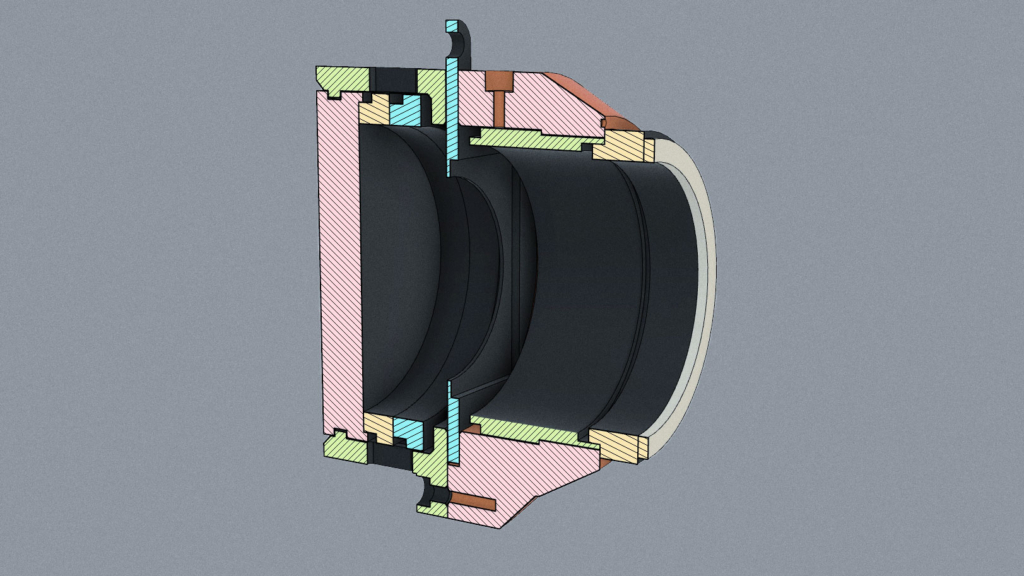
Of course you can use any other brands like Nikon, Sony, etc. just get an extension tube for your lens that you want to use as a projection lens. But you might have to change the inside diameter and the length of the gobo lens holder to fit your specific extension tube and to have the correct focal flange. I made this especially to work with Canon EF & EF-S lenses therefore the length from Canon Mount to focal plane is excactly 44mm.
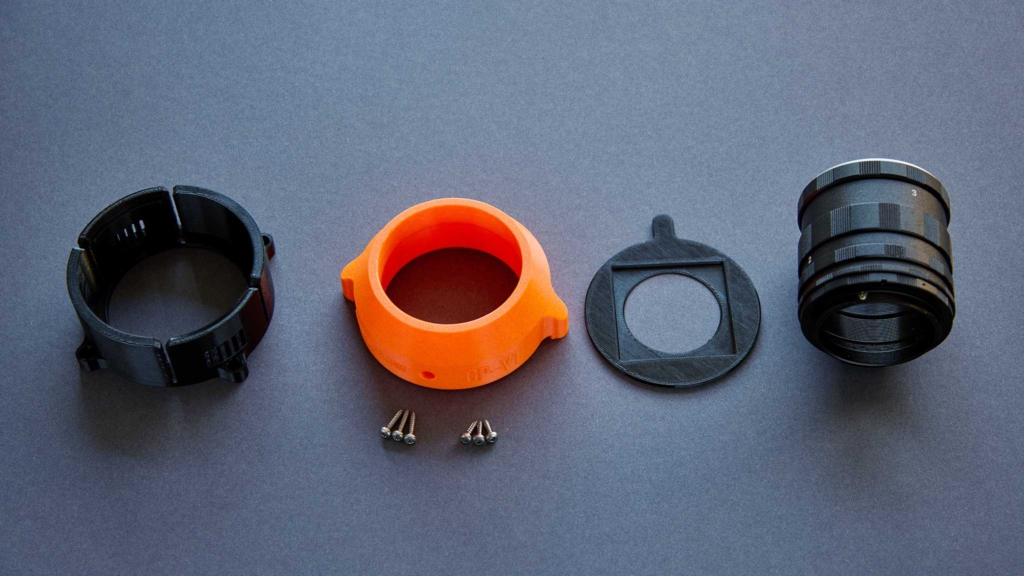
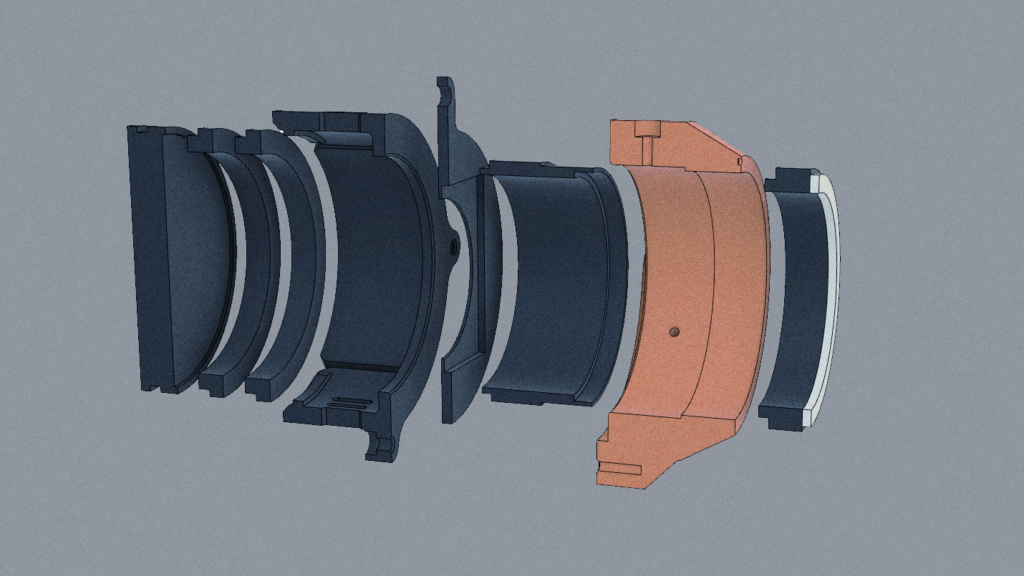
Use only the biggest Ring Nr. 3 and the Canon EF mount ring. Screw them together with the Gobo Lens Holder in between. I know these extension tubes have different tolerances therefore I also uploaded the CAD STEP files in case you need to change the inner diameter of the front part or create your own gobos.
Assembly is really easy, both parts are screwed together using 3x wood screws D2,9 x 13mm (DIN7981). The extension Ring Nr. 3 is held in place by 3x short wood screws D2,9 x 9,5mm (DIN7981).
Bill of materials:
3x ISO 14585 (DIN7981) diameter 2.9mm x length 13mm (https://amzn.to/3WgKty1)
3x ISO 14585 (DIN7981) diameter 2.9mm x length 9.5mm (https://amzn.to/4bVYsz6)
1x Canon EF Macro Extension Tube (https://amzn.to/3Ysffqa)
I may earn a commission on qualifying purchases (at no extra cost to you)

The upper part from the 3d printed black housing is flexible (therefore I used PETG) and can be bent a little bit outwards by pulling the chamfer. This way you can fit the Godox V1 or H200R until it stays fixed in the recess. It’s not very sophisticated but simple and it works for me. Feel free to remix and improve it. Let me know what you come up with! To remove the flash head, just hold and turn it 90° like with a camera lens then you can pull it out.
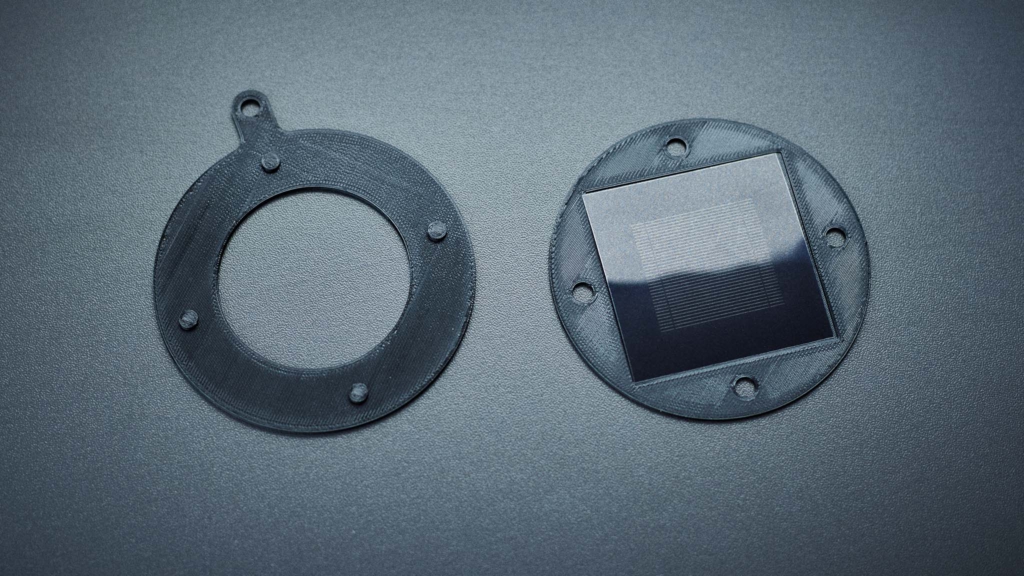
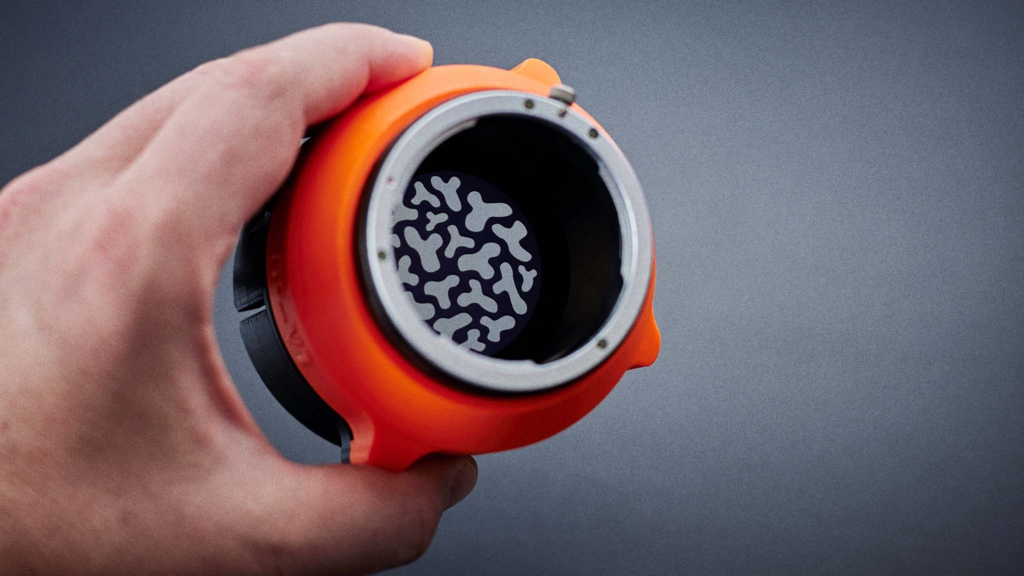
Here are some quick test shots using the 3d printed blinds gobo and some ambient light. I’ve also included a dia frame holder for 50 x 50mm dias and gel, diffuser holders and some blinds, stripes. Still need to design some more gobos especially something with foliage for food photography.
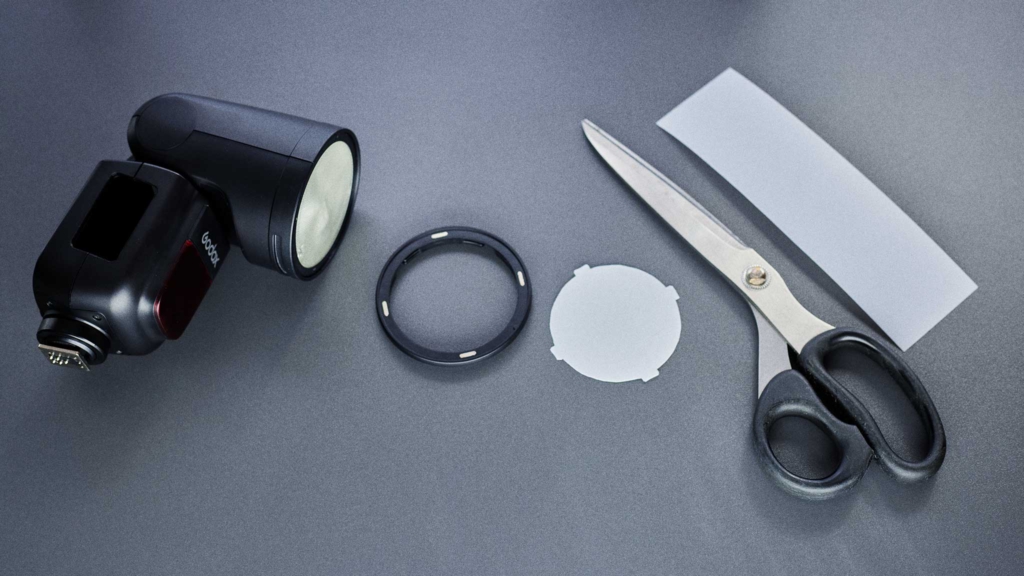
It’s also easy to print with a laser printer different kinds of patterns, pictures or gobos on a transparent film and glue it to the included gobo holder. This way you can literally project any pattern you want. Just be creative with it. The size of the printed gobos are 50x50mm. Search the internet there are thousands of patterns if you don’t want to create your own.
Will update this post when I have more stuff to show. These were just some quick test shots.


I’ve uploaded the STL and CAD files to Prusaprinters and Thingiverse. Download them for free from here:
https://www.prusaprinters.org/prints/76232-godox-gobo-projector-v1-ad200pro-h200r
https://www.thingiverse.com/thing:4968758
If you need a bigger Gobo Projector with Bowen-S mount check this out from Petri Damstén. I got inspired by his project to create my own compact version:
https://petridamsten.com/gobo-holder/
[…] I made an update on how to get better results with the Godox V1 & AD100 Pro using my DIY Gobo projector. The AD200 Pro works perfect because it has a frosted glass front. The V1 & AD100 Pro does not have this. So you need some diffusion inside the gobo projector to illuminate the gobo evenly. You can use translucent foam from packaging or anything that diffuse light. Cut out a circle with 76mm in diameter and use some double sided tape to fix it inside the gobo projector.Read my full article on how to build your own gobo projector here:https://www.schweinert.com/diy-gobo-projector-godox-v1-ad200/ […]