
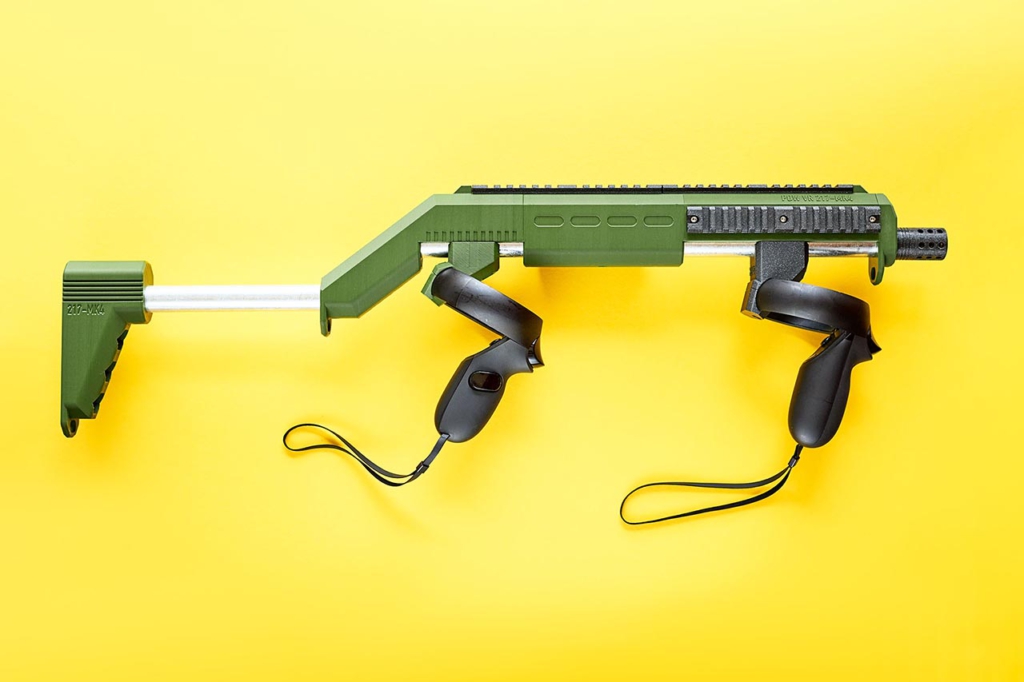
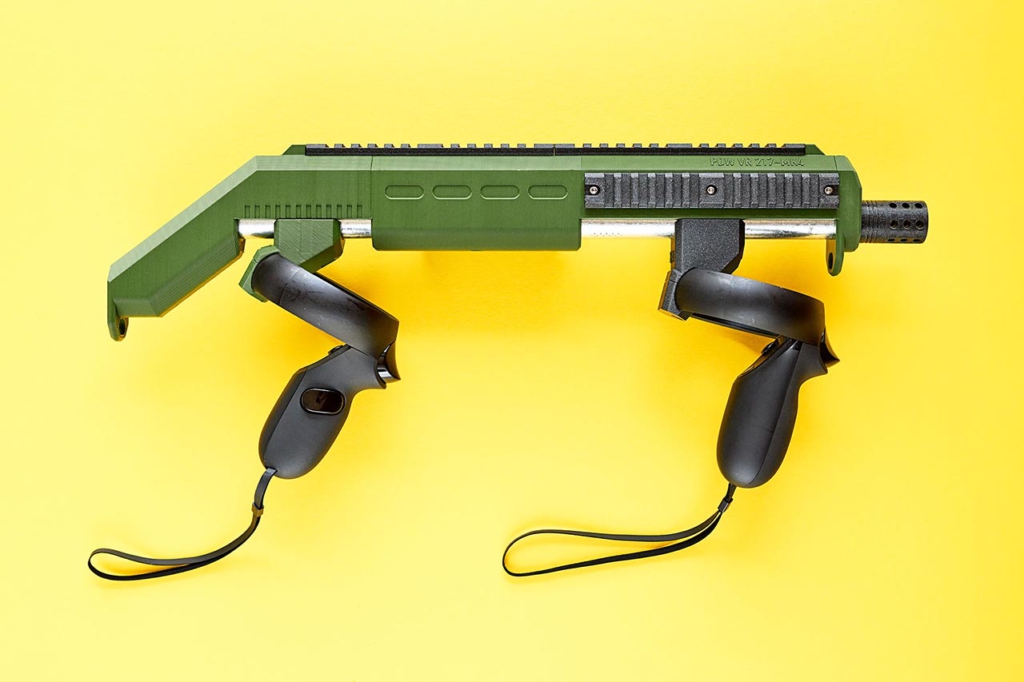
I’ve finished designing my own VR Gunstock PDW / RIFLE MK4 for Oculus Rift-S and QUEST. You can buy the STL files from the link below if you want to 3d print your own VR Rifle.
Buy from here: PDW VR 217-MK4
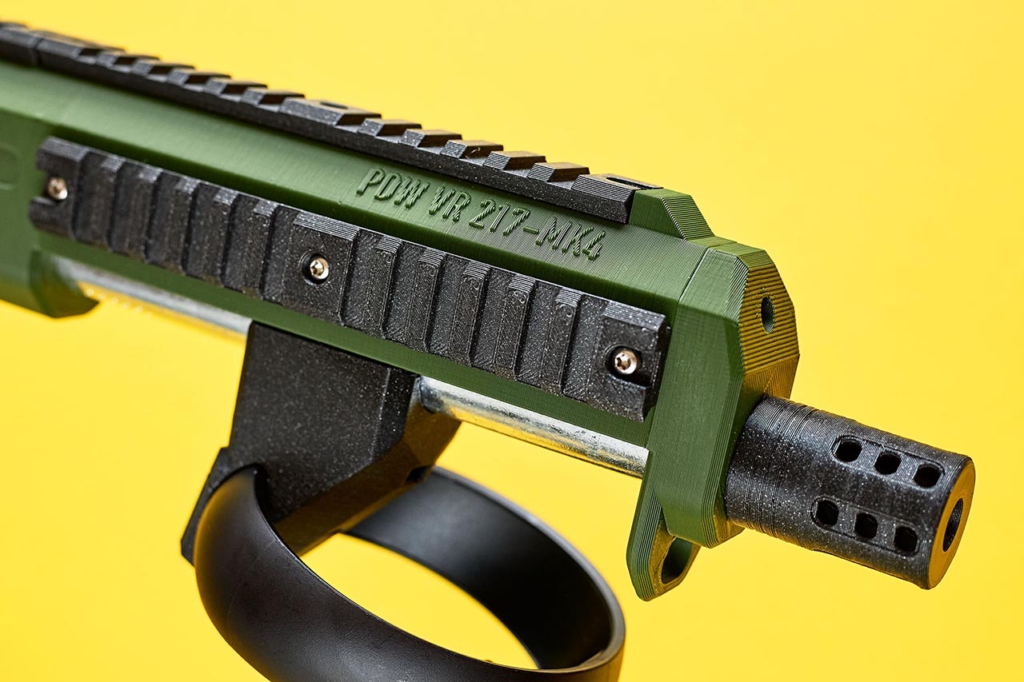
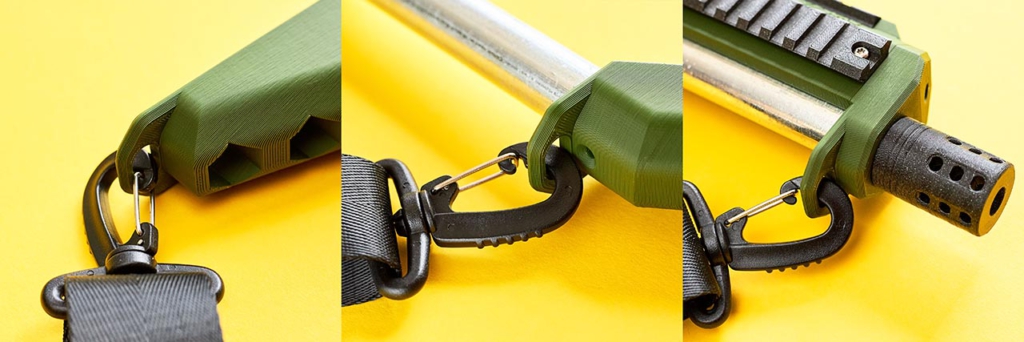
For a more realistic look I’ve added a couple of details like picatinny rails on the top and both sides. At the bottom there are 3 holes to add a sling. You can use whichever suits you better. I use a sling from my old laptop bag.
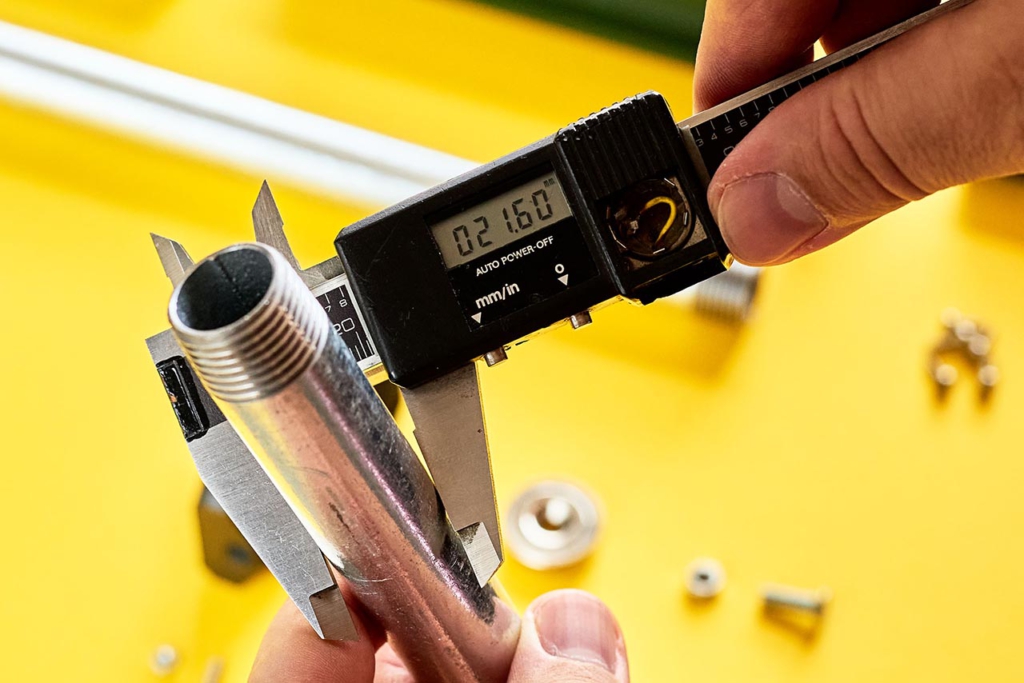
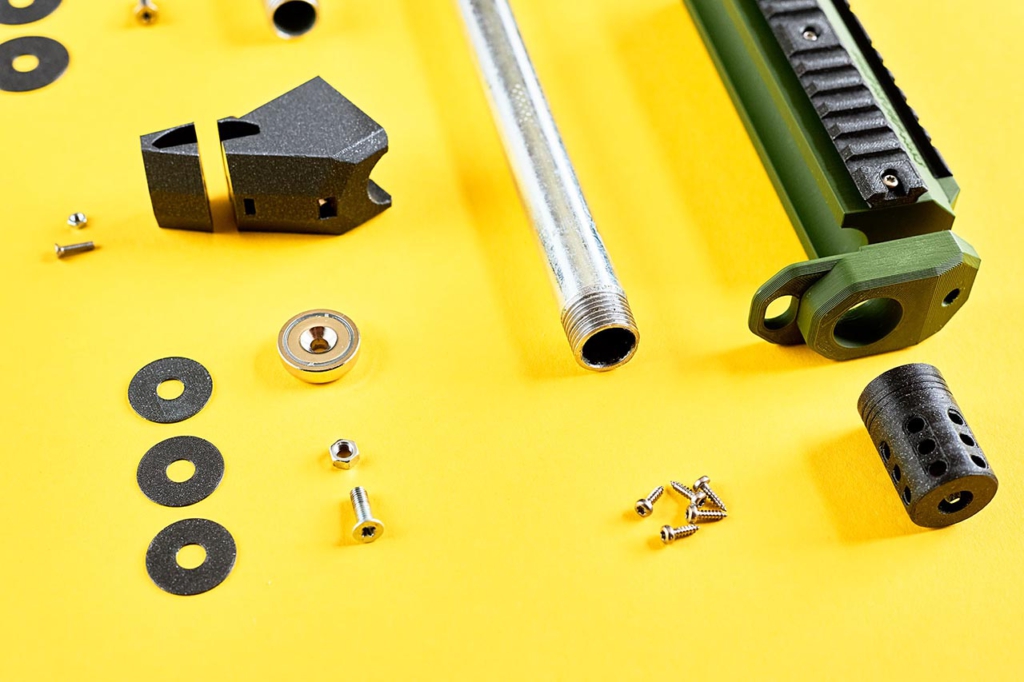
I’ve tried to use only materials that you can get from european home improvement markets like OBI Baumarkt, V-Baumarkt, Bauhaus, etc. The pipes may differ in outer diameter from 21.3mm up to 21.6mm. The holes in the designed parts are 21.7mm. Use galvanized pipes to avoid rust corrosion over time.
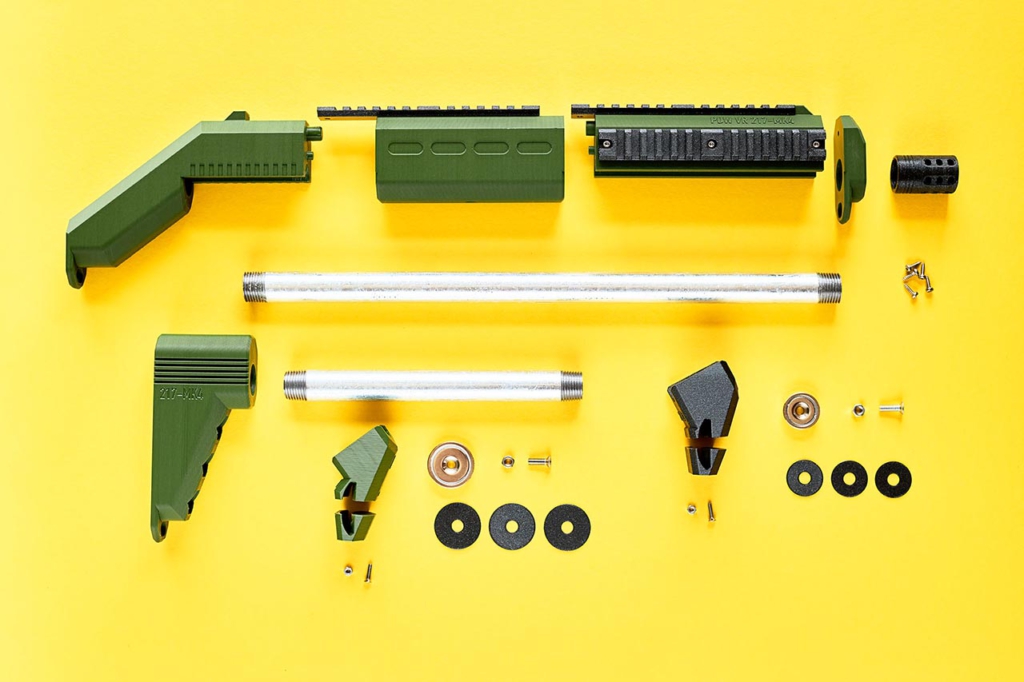
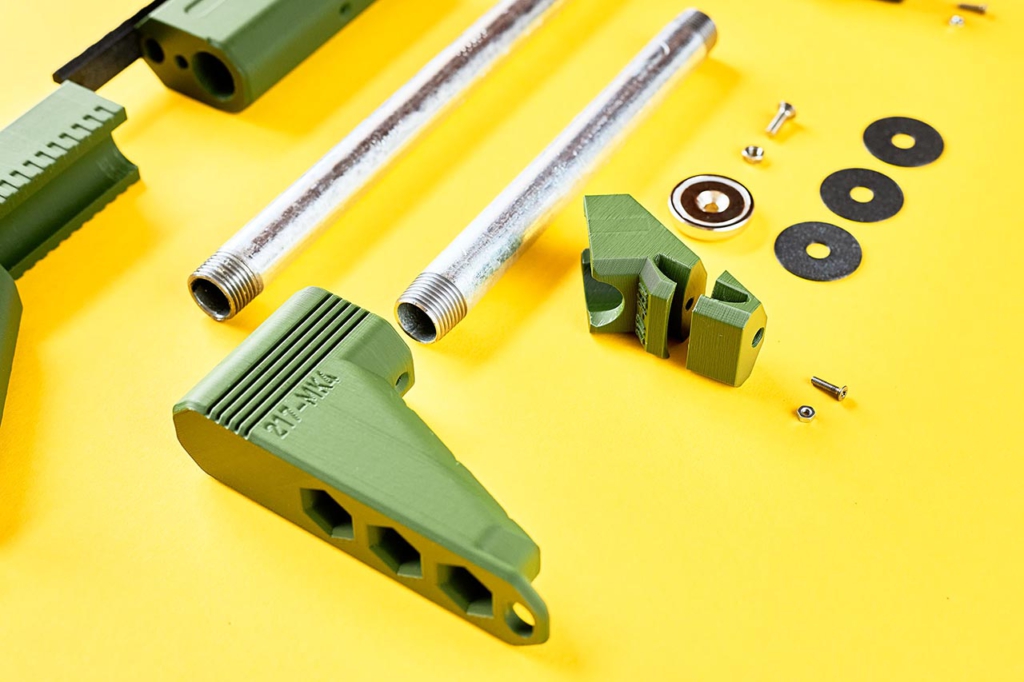
Bill of materials:
1x 1/2″ pipe length= 400mm (outer diameter 21.6mm) galvanized
1x 1/2″ pipe length= 200mm (outer diameter 21.6mm) galvanized
2x M5x16mm screws DIN7991 / ISO10642 for the controller holder
2x M5 hex nut DIN934 / ISO4032
2x M3x12mm screws DIN7991 / ISO10642 for the controller holder
2x M3 hex nut DIN934 / ISO4032
13x screws 2.9x13mm DIN 7981 / ISO14585 for rails and front sling body
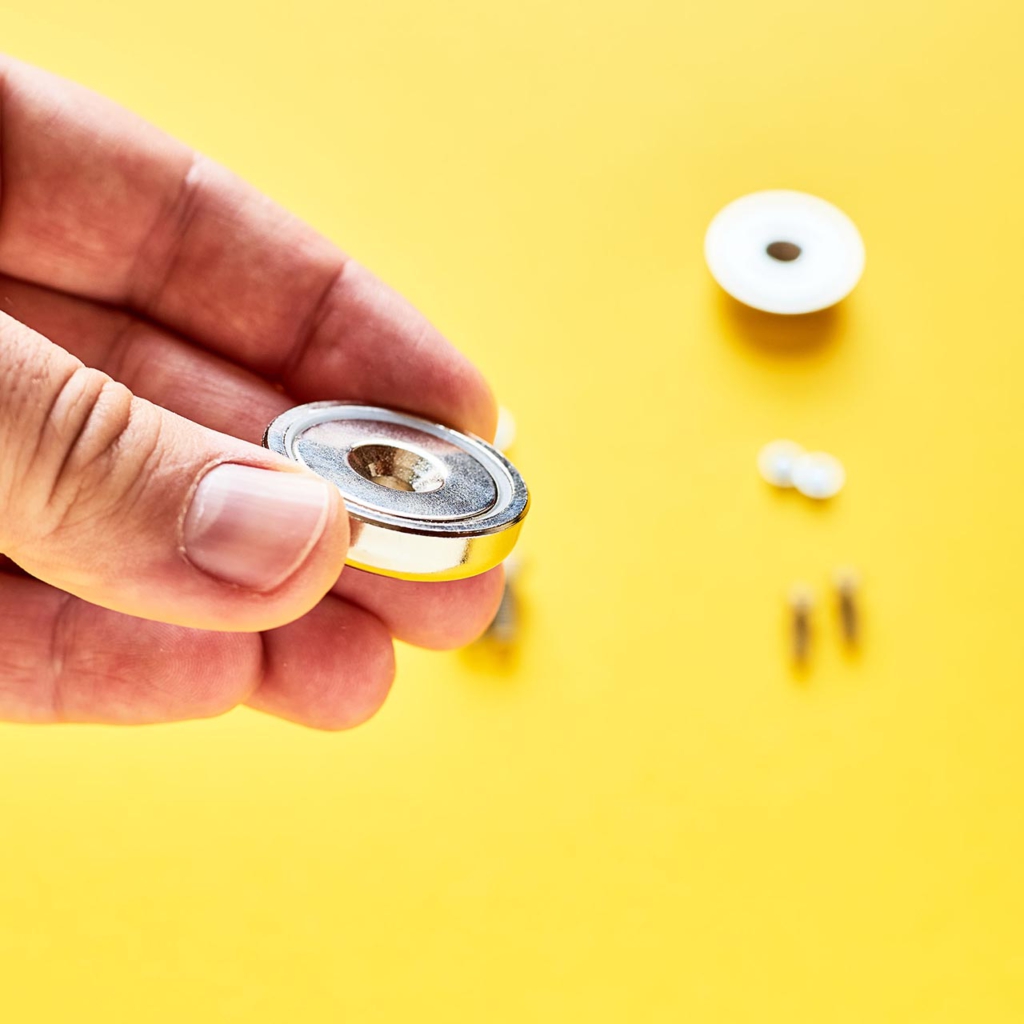
1x Pot magnet with hole (diameter 32mm / height 8mm N45 – 34Kg)
1x Pot magnet with hole (diameter 25mm / height 8mm N45 – 22Kg)
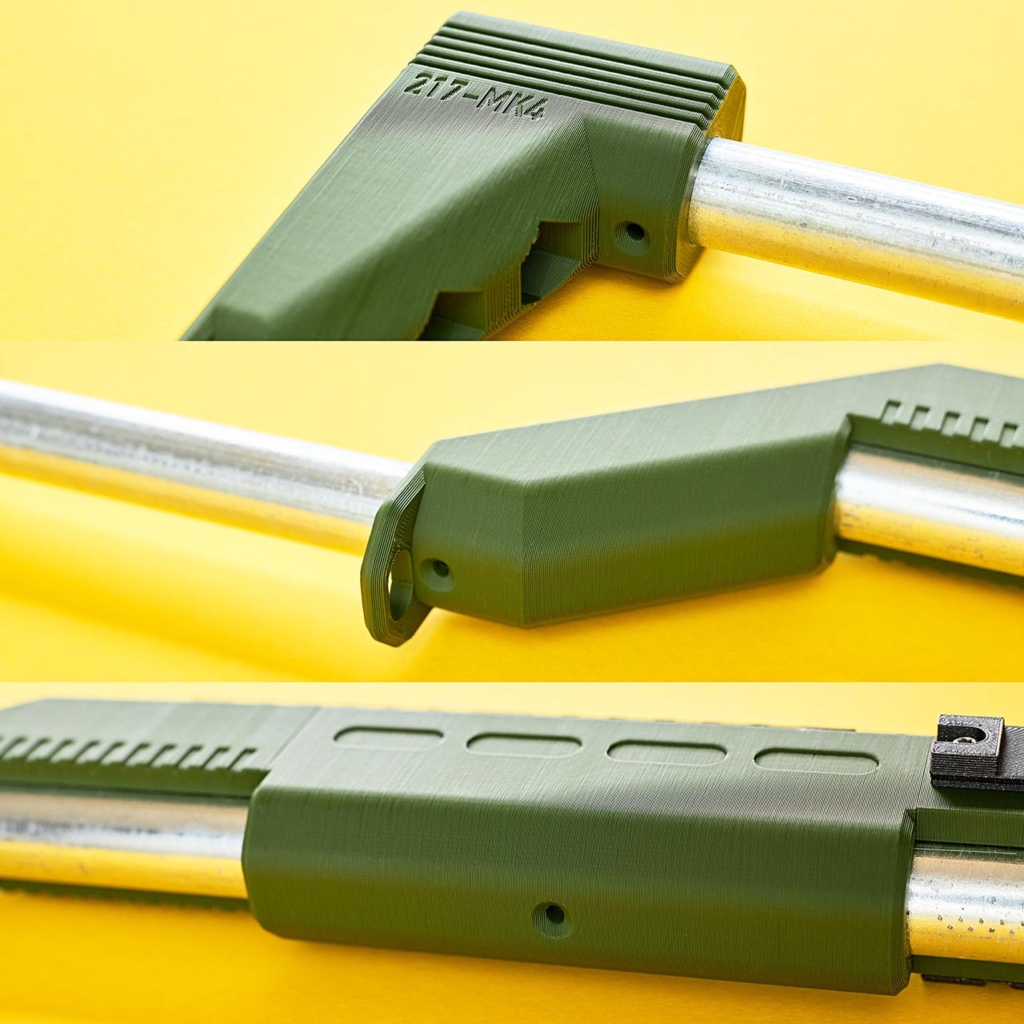
Not really mandatory – only if you want it more sturdy and to fix the buttstock and main body part in place. Then you have to drill a 2.5mm hole into the pipes and cut a M3 thread with a tap drill. Add the 3 screws and you’re done.
3x M3x12mm screws DIN7991 / ISO10642
See the picture below for the M3 screws location.
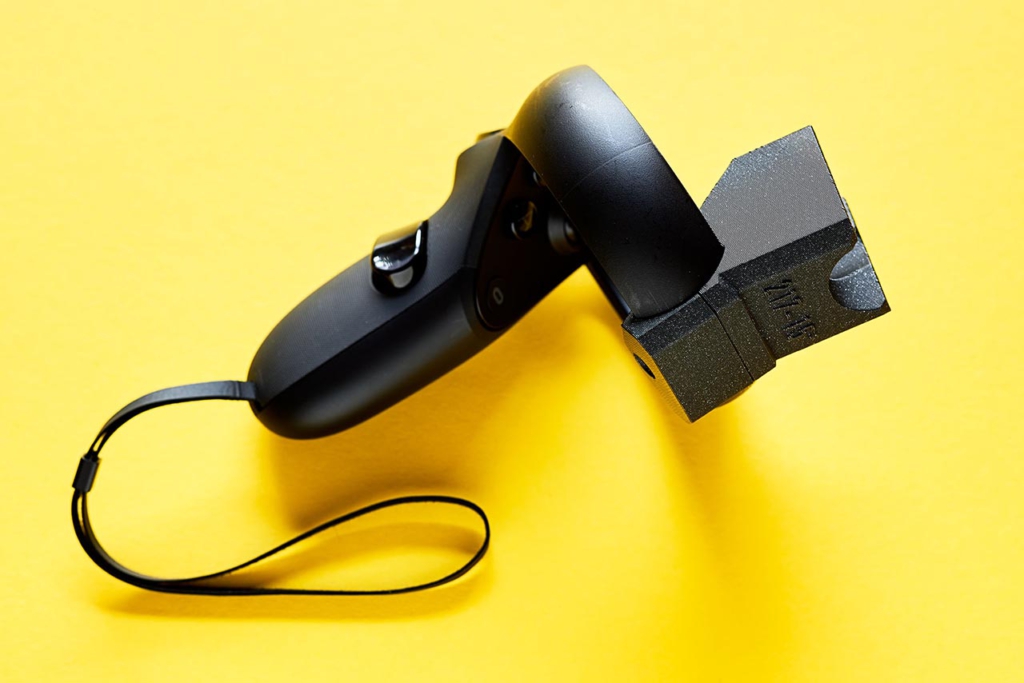
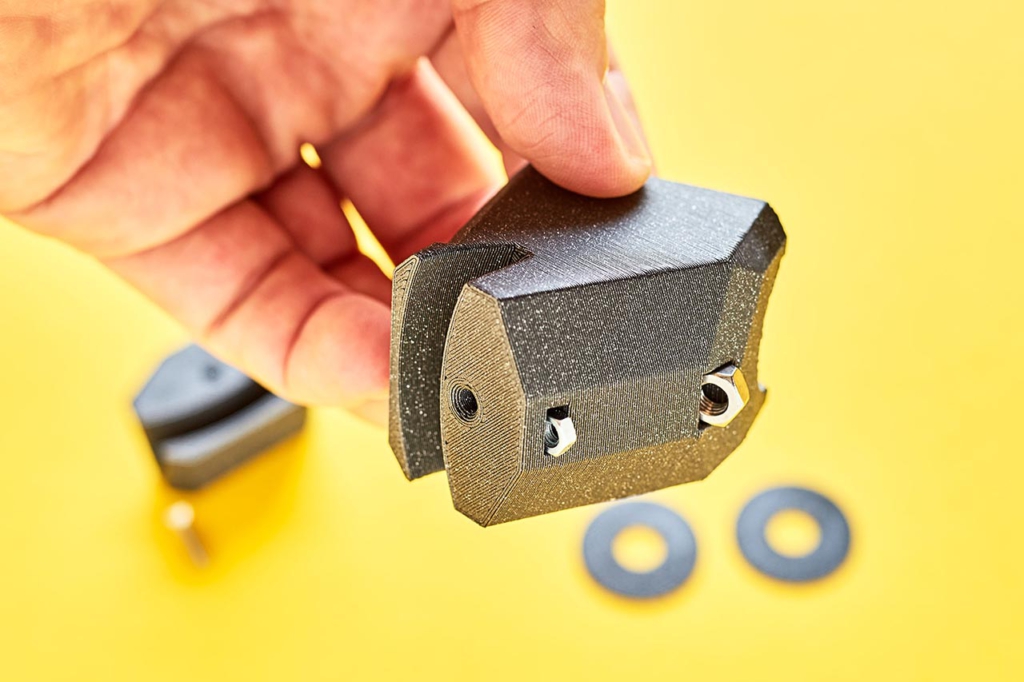
Magnetic holder for the Oculus Rift-S / QUEST controller. There are two types of the holder. One with 30° angle and 15° angle. You should use the 30° angle with your dominant trigger hand and D32mm magnet.
The 15° is almost straight and used like a vertical grip on a rifle. The 15° also uses the weaker D25mm magnet for easier reloading procedures in VR. You can also switch them to try whichever suits you best. Of course the 25mm magnet will fit also inside the 30° body with 32mm hole.
When 3d printing the top body of the magnetic holder make sure your overhangs are dialed in, or the Oculus controller ring might not fit correctly. In that case press on the overhangs with pliers to squish them or use a nail file to remove them.
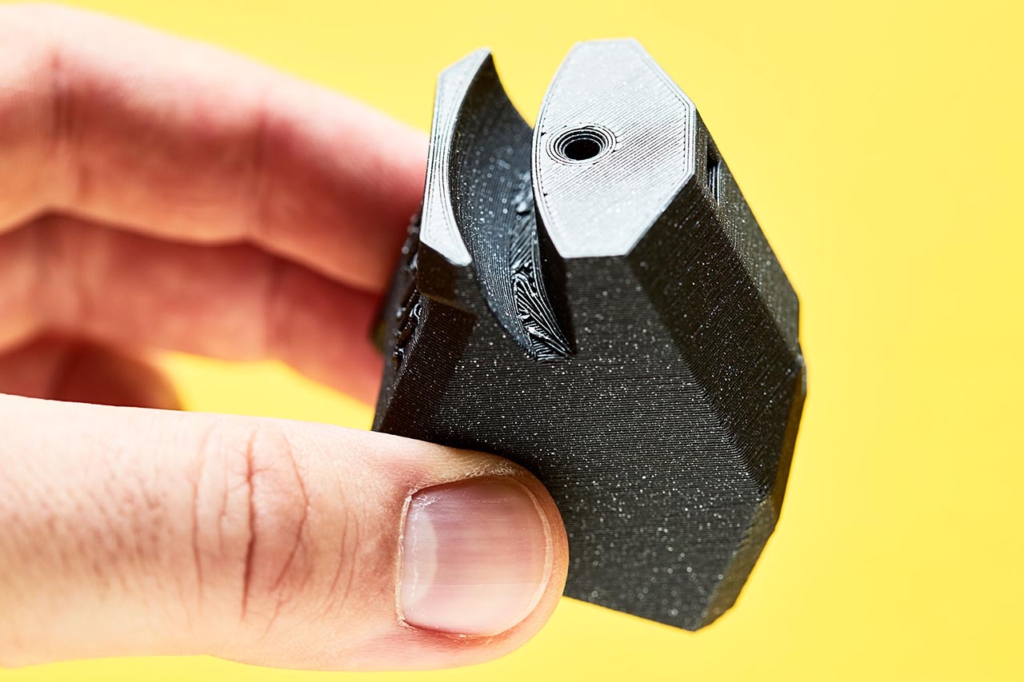
When the overhangs are dialed in or smooth there should be only a tiny gap 0.5mm between top and bottom body of the magnetic controller.
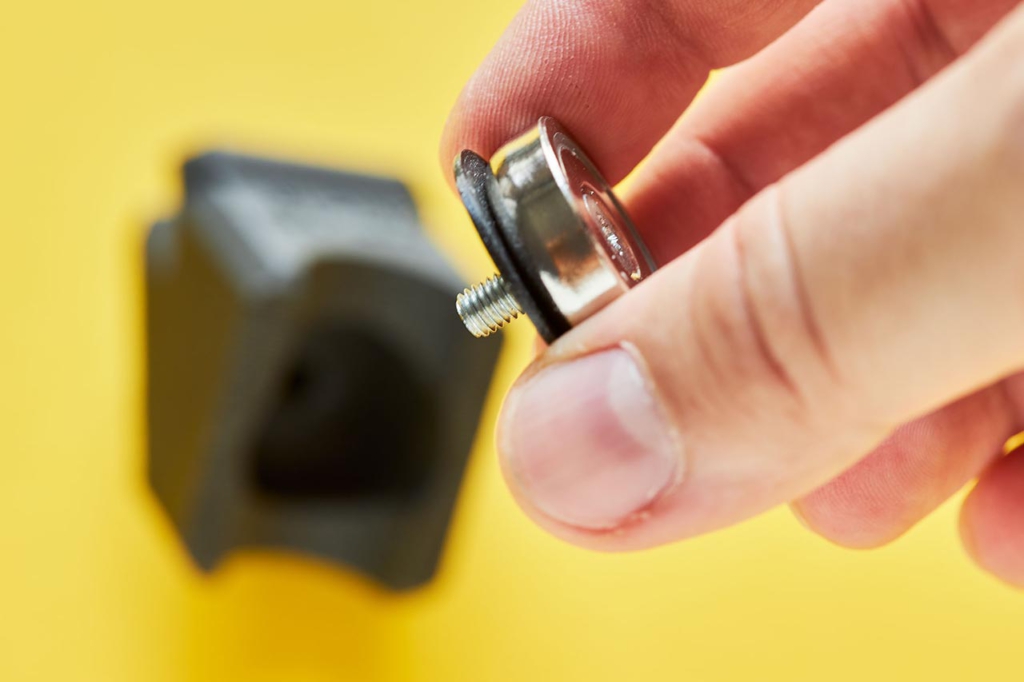
The washer / shim have various thicknesses 0.6mm, 0.8mm and 1.0mm. They’re used to increase or decrease the magnetic pull force. This is great if you want your grip hand to be easily detachable from the pipe when doing the reloading ammo procedure in VR.
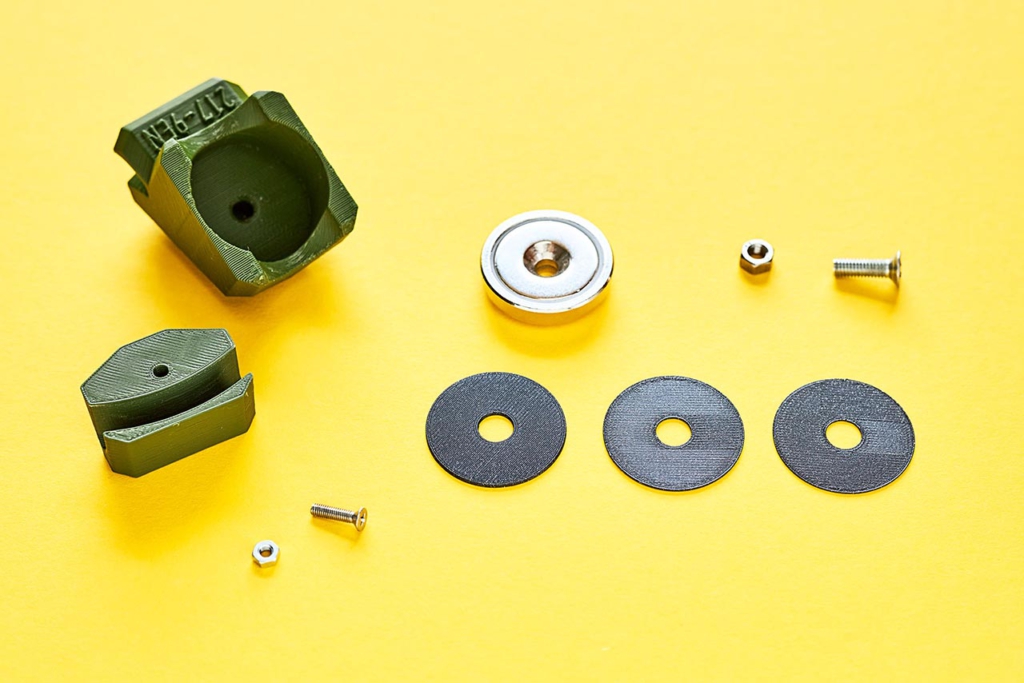
Use the shim / washer under the magnet to increase or decrease the distance between magnet and pipe. If no shim / washer is used the magnetic adhesion is very weak. If you use the thickest 1.0mm shim the adhesion is very strong. But be careful you put a lot of stress on the Oculus controller ring when detaching it. I cannot be held responsible if you damage anything. Choose wisely.
First I wanted to use threaded inserts for the parts but for some people it’s cumbersome to install them with a soldering iron. Therefore I decided to use standard M5 and M3 nuts that you can get everywhere. Put them into the slots and fix the parts with the screws. If you remove the magnetic holder often from your Oculus controllers then use a tiny drop of superglue on the edge of the M3 nut to fix it inside the slot or it will fall off every time you dismount the holder.
If you want it more compact leave the buttstock and use it like a PDW. At the back and front body there are holes for a sling in case you want to use one.
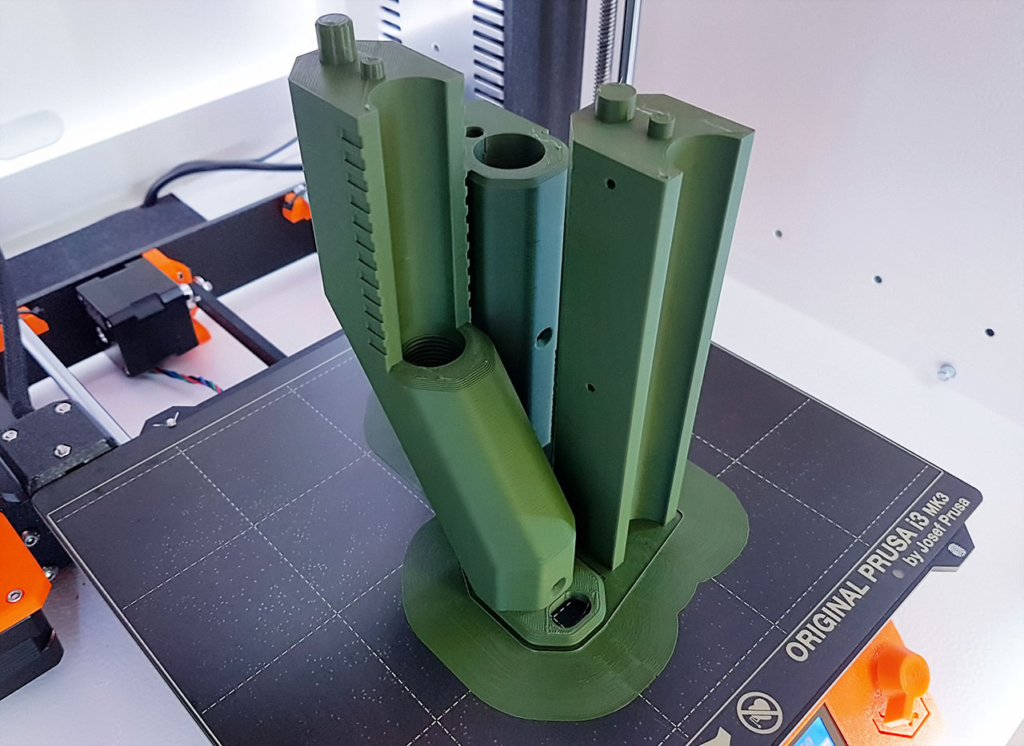
I printed the parts on a non-modified Prusa i3 MK3 with Prusament PLA army green and galaxy black. I used the default 0.3mm DRAFT profile for faster printing with no supports and 20% infill. For the main body parts I used a huge 25mm brim to avoid tipping over.
To avoid tipping over I used a huge 25mm brim on the main body parts. It took almost 10 hours to print these 3 parts but they came out pretty well.